Telegram Connector
This connector allows your assistant to interact with users on Telegram through a Telegram Bot.
To use it, you will:
- Create a Telegram bot and obtain its Bot Token using the official Telegram
@BotFatherbot. - Configure the Telegram connector in the Pupau AI Platform by pasting the Bot Token and adjusting access settings.
The connection mode (Webhook or Polling) is managed by the platform at environment level, so you do not need to configure webhooks or polling manually for each agent.
Implementation
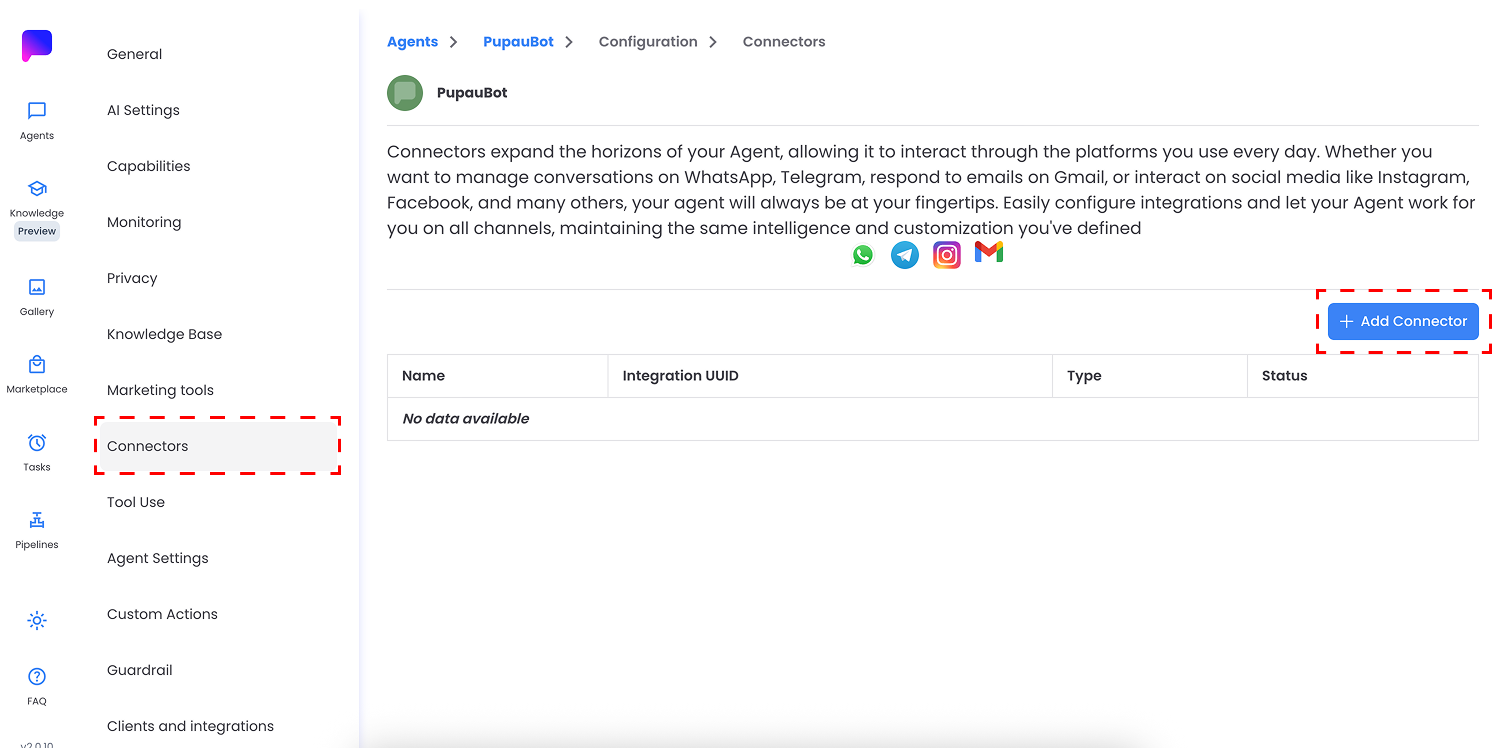
Step 1 – Open the Connectors section and add a new connector
Go to your assistant configuration page, then open the "Connectors" section in the left sidebar.
Click the "Add Connector" button on the right.
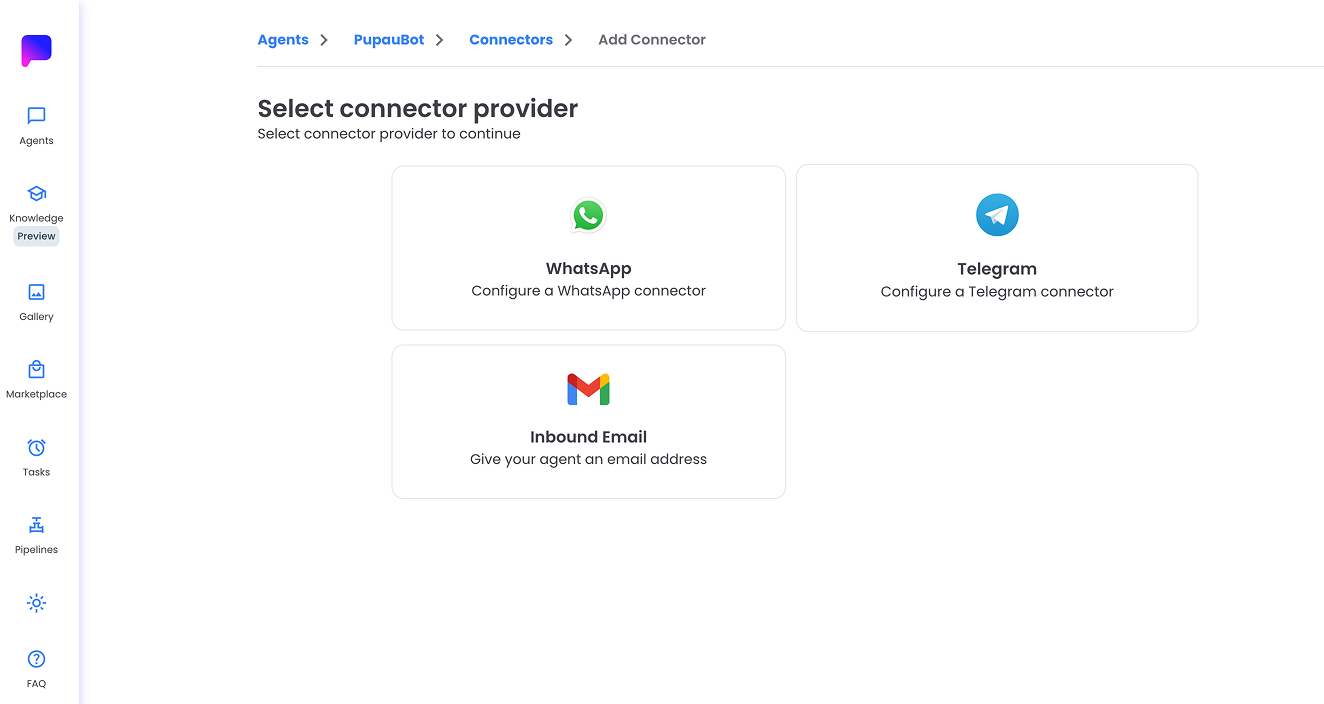
Step 2 – Select the Telegram connector
In the "Select connector provider" screen, choose "Telegram".
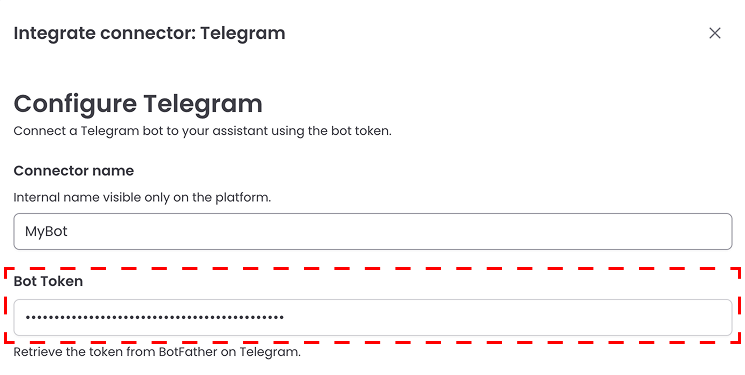
Step 3 – Configure Telegram connector and provide the Bot Token
In the "Integrate connector: Telegram" modal:
- Connector name: enter an internal name for this connector (you can edit it later).
- Bot Token: paste the token of the Telegram bot you created with
@BotFather.
If you do not yet have a bot or a token, see the section "Create a Telegram bot and get the Bot Token" below.
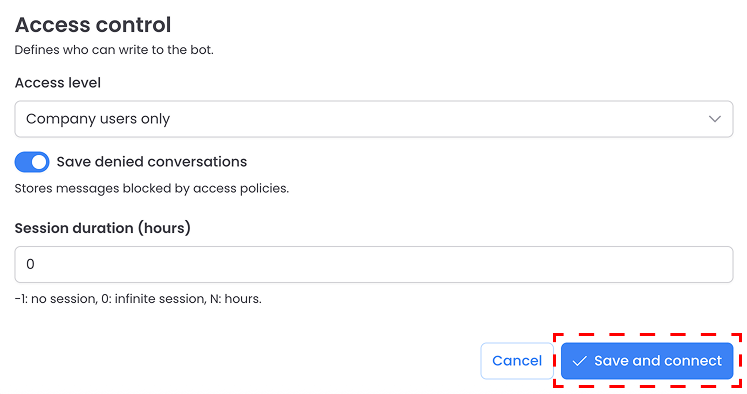
Step 4 – Configure access control and save
In the "Access control" section you can define how users can interact with the bot:
- Access level: choose who can write to the bot. The available options are:
- Open to all – anyone who can reach the bot on Telegram can write to it.
- Company users only – only users that belong to your organization (as defined in Pupau) can start a conversation with the bot.
- Agent-enabled users only – only users who have been explicitly enabled for the agent can interact with the bot.
- Specific users only – only a custom list of users that you configure can write to the bot.
- Save denied conversations: toggle this on if you want to store messages that were blocked by access policies.
- Session duration (hours): configure the conversation session duration.
-1means no session.0means an infinite session.- Any positive number defines the session duration in hours.
When you are done, click "Save and connect" to create and enable the connector.
Step 5 – Verify the connector status
After saving, you are returned to the Connectors list where you should see your new Telegram connector
You can click on the connector row to open its details page, review its configuration or edit it later if needed.
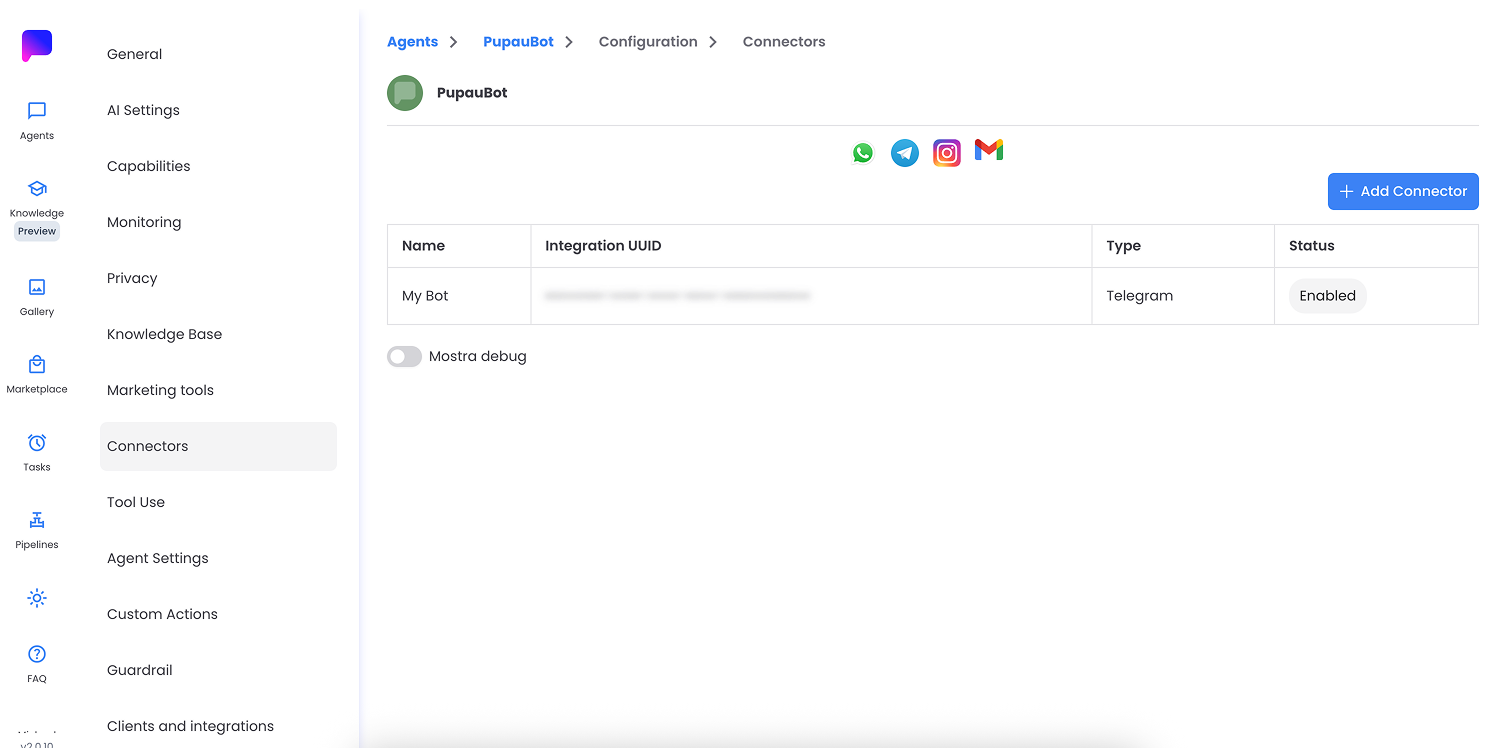
Once the connector is enabled, messages sent to your Telegram bot will be routed to your assistant, and the assistant's replies will be delivered back to users on Telegram.
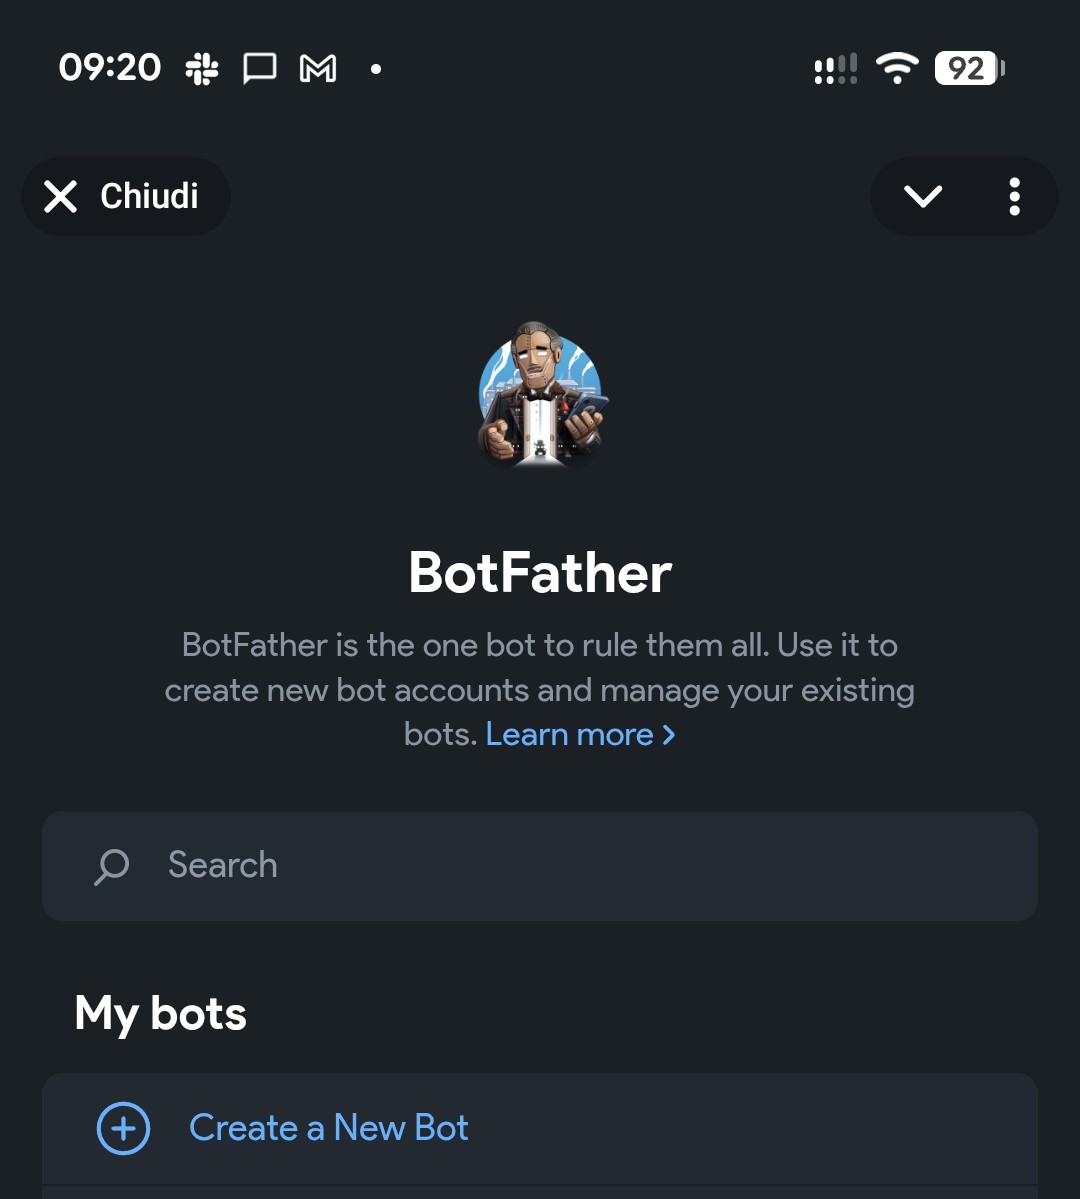
Create a Telegram bot and get the Bot Token
If you do not already have a Telegram bot, follow these steps using the official Telegram @BotFather bot.
@BotFather is provided by Telegram and is the official way to create, configure and manage bots.
Prerequisites
- A Telegram account (mobile or desktop app).
- The Telegram app installed on your device or access via
https://web.telegram.org.
Step 1 – Open BotFather
- Open Telegram.
- Search for
@BotFatherand open the verified BotFather chat. - Press the Create a New Bot button
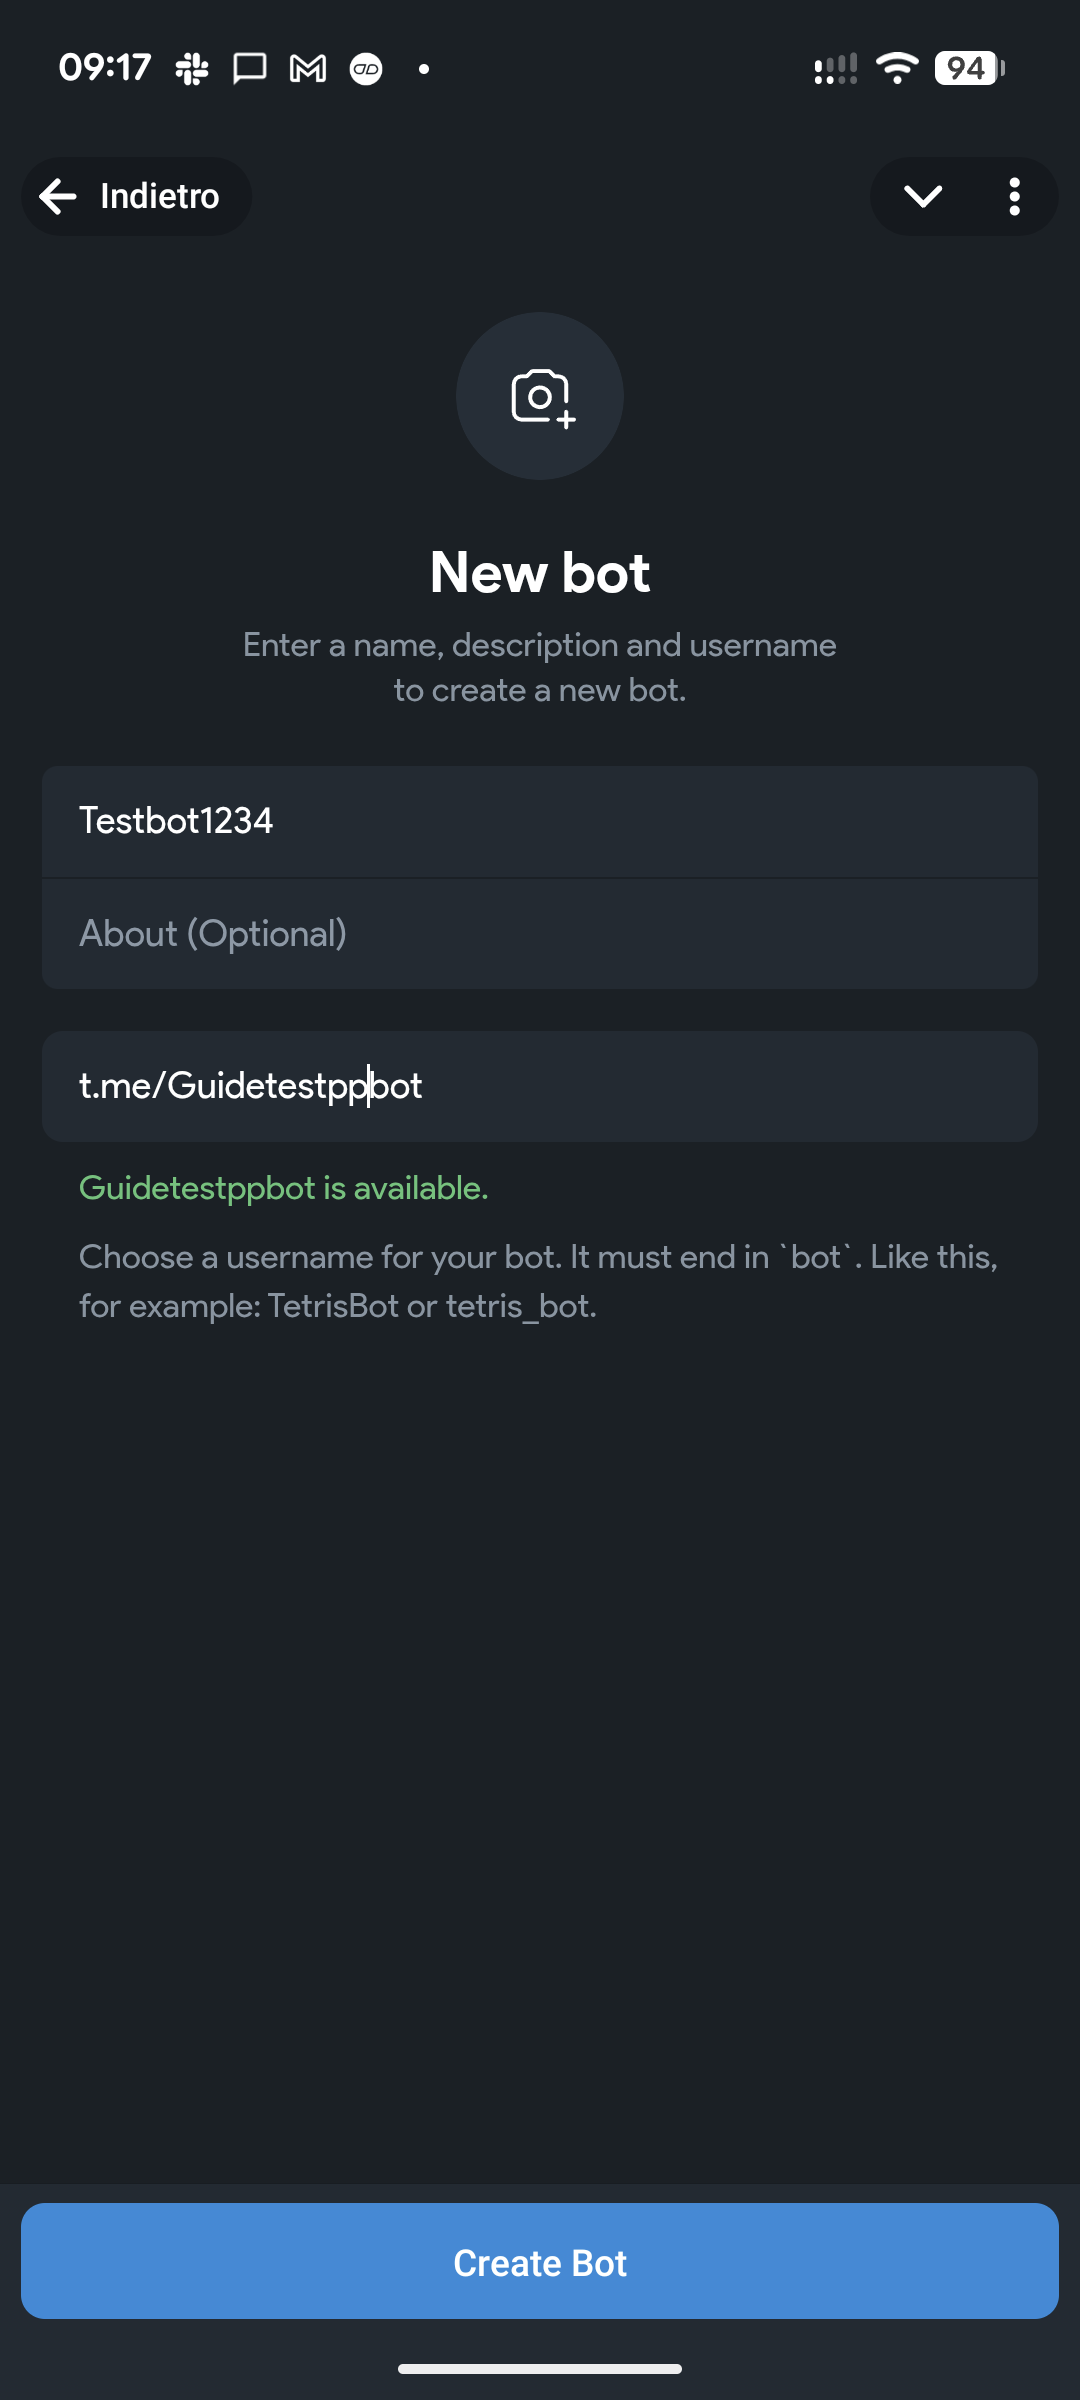
Step 2 – Create a new bot
- BotFather will ask you for:
- A name for your bot (this is the display name users will see, for example
Pupau Support Bot). - A username for your bot, which must be unique
- A name for your bot (this is the display name users will see, for example
- Once you choose a valid name and username, BotFather will create your bot.
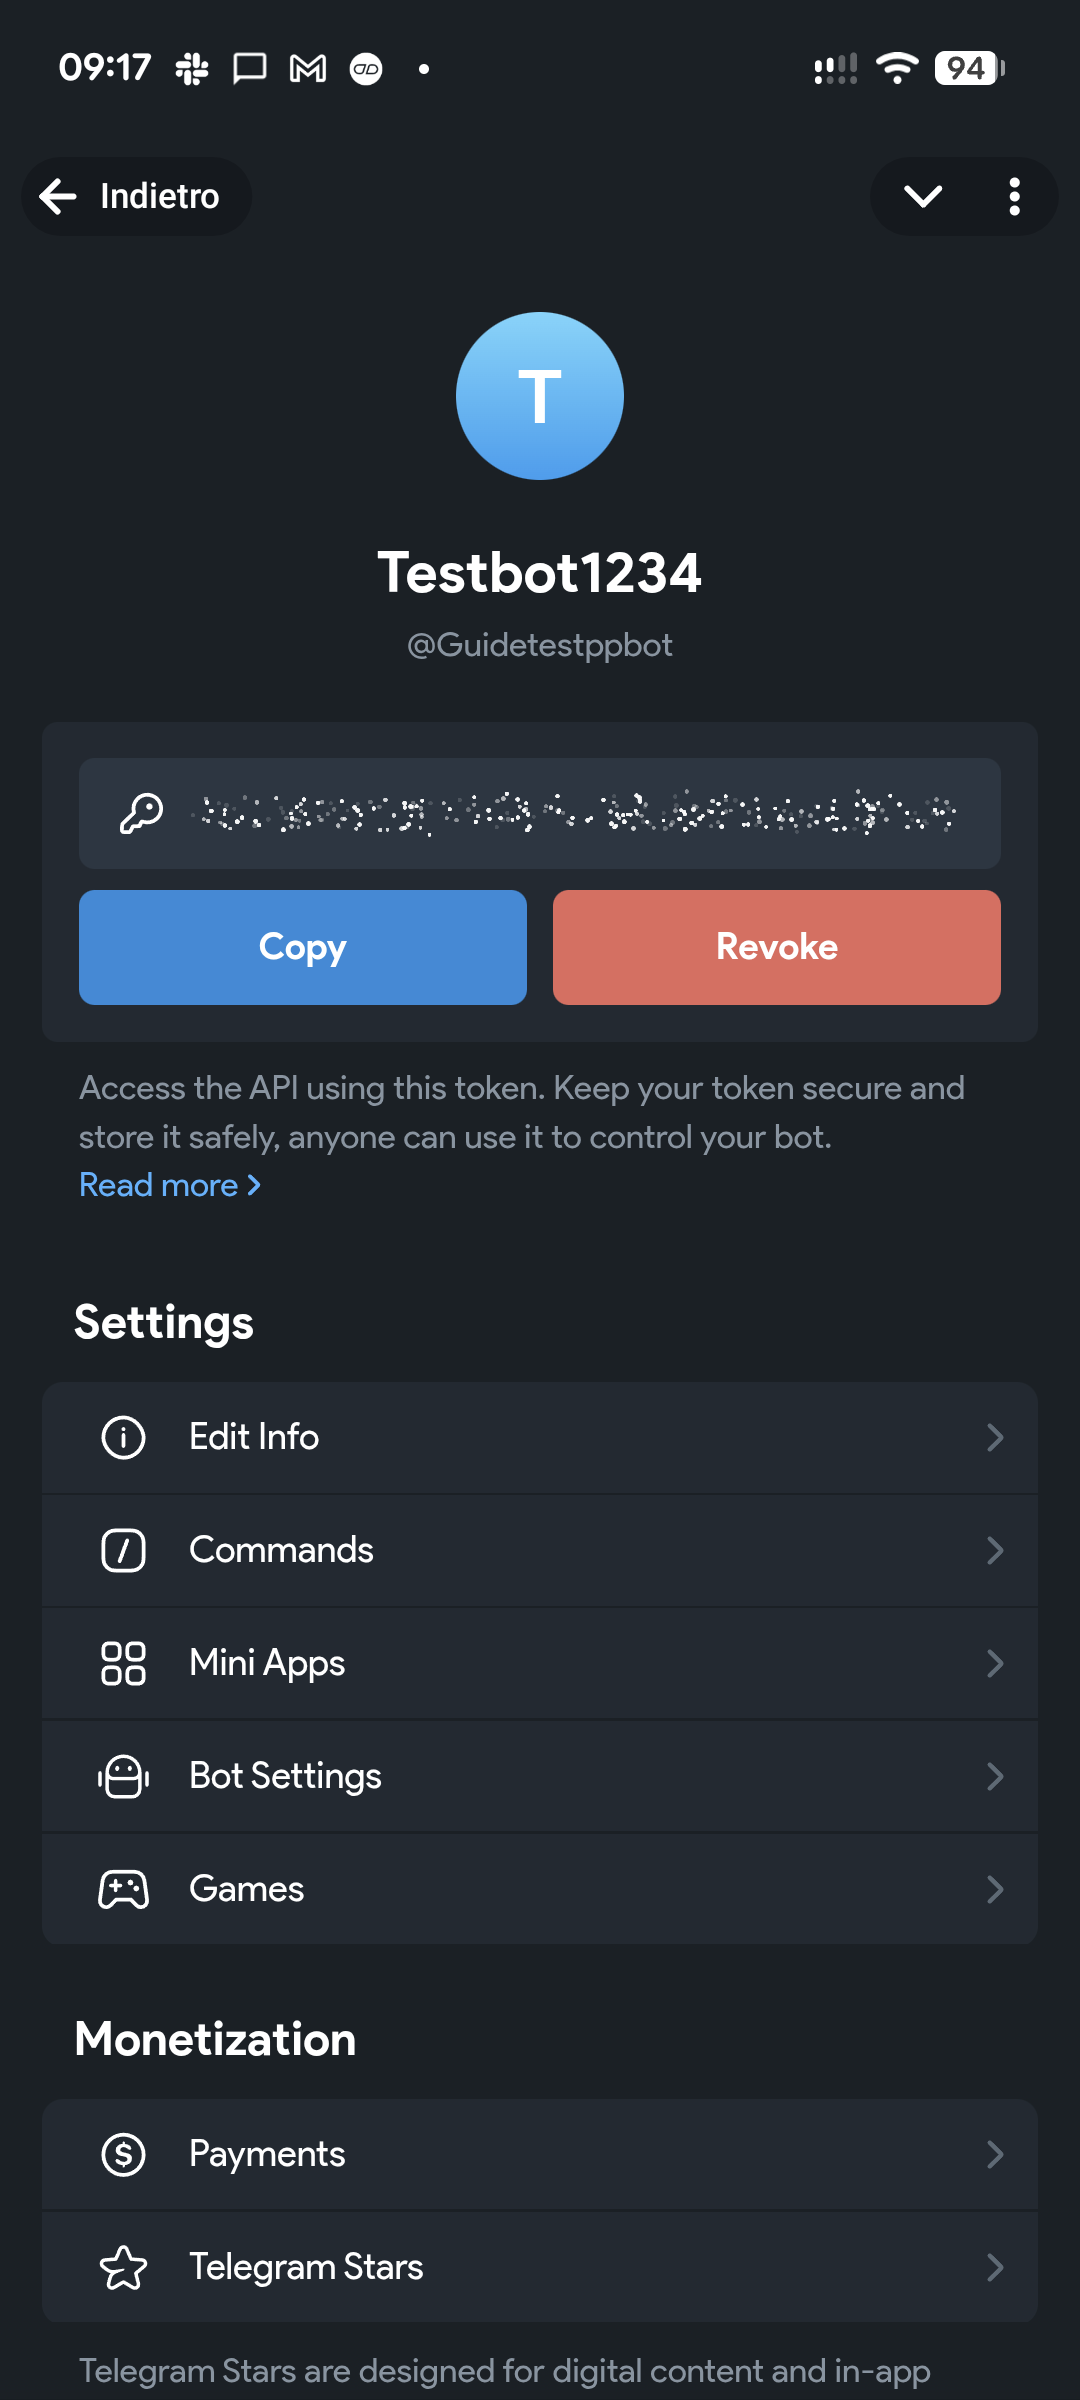
Step 3 – Copy the Bot Token
After creating the bot, in the bot info you will be able to Copy the bot token that will be used in the Pupau connector configuration.
This token uniquely identifies your bot and is used by the Pupau AI Platform to connect to Telegram.