Marketing Tools
Lead Generation Form
Lead Generation Form is prompted when non-authenticated users access the assistant using an official integration such as WordPress, Magento, etc.
Click on 'Configure lead generation form' to configure the form.
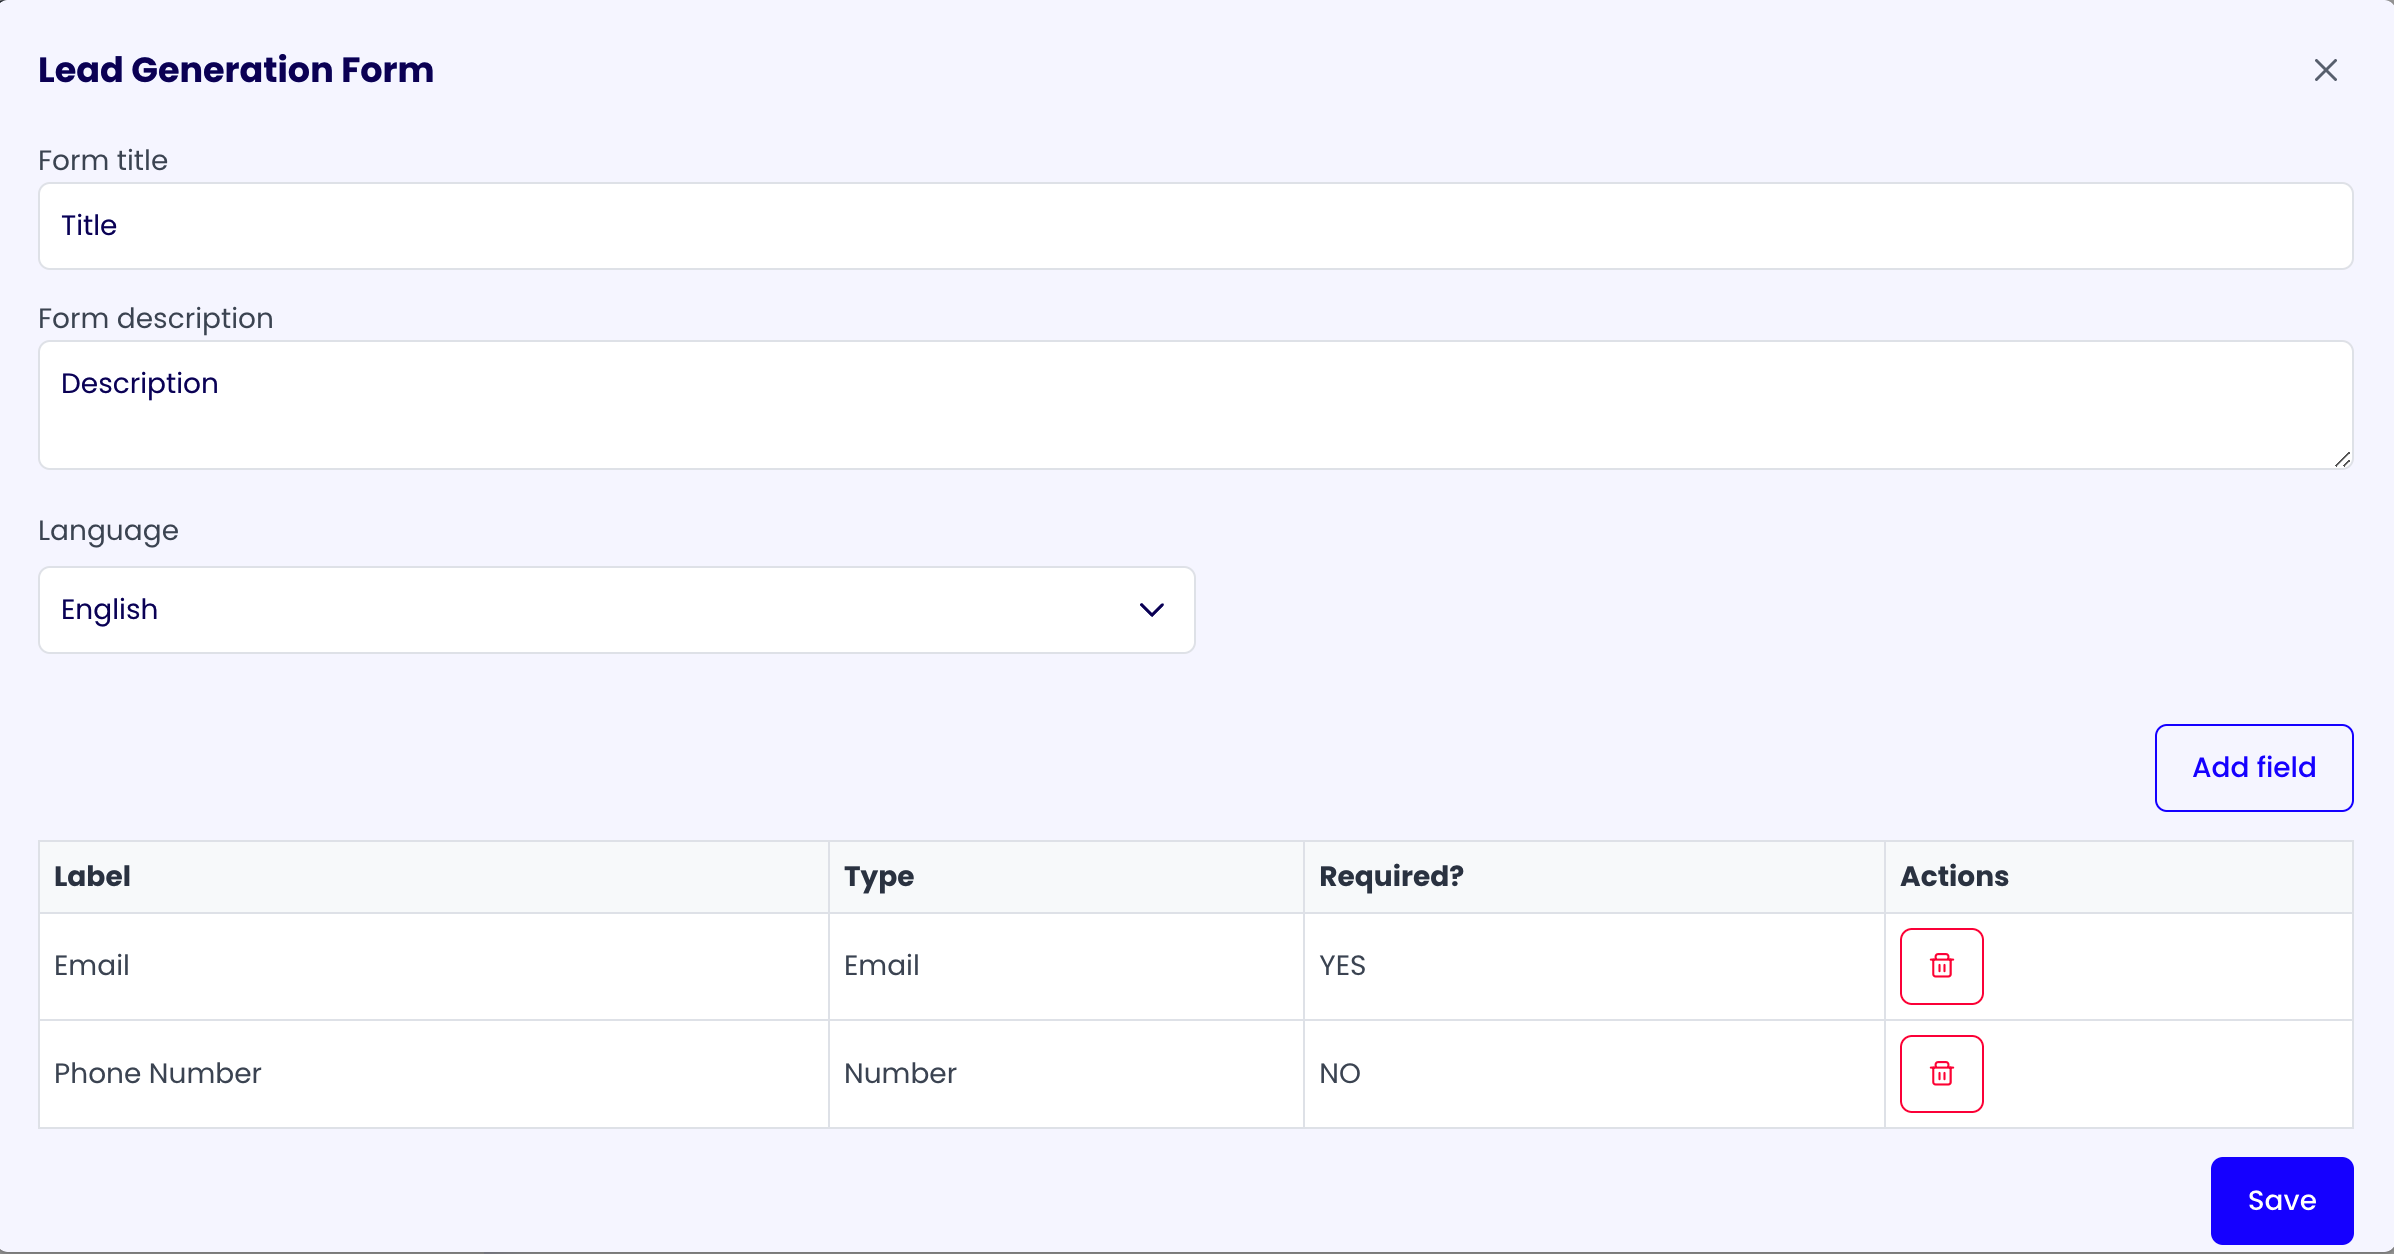
Lead Generation Form Configuration
When you open the lead generation form, you will see the following fields:
- Form title
- Form description
- Language
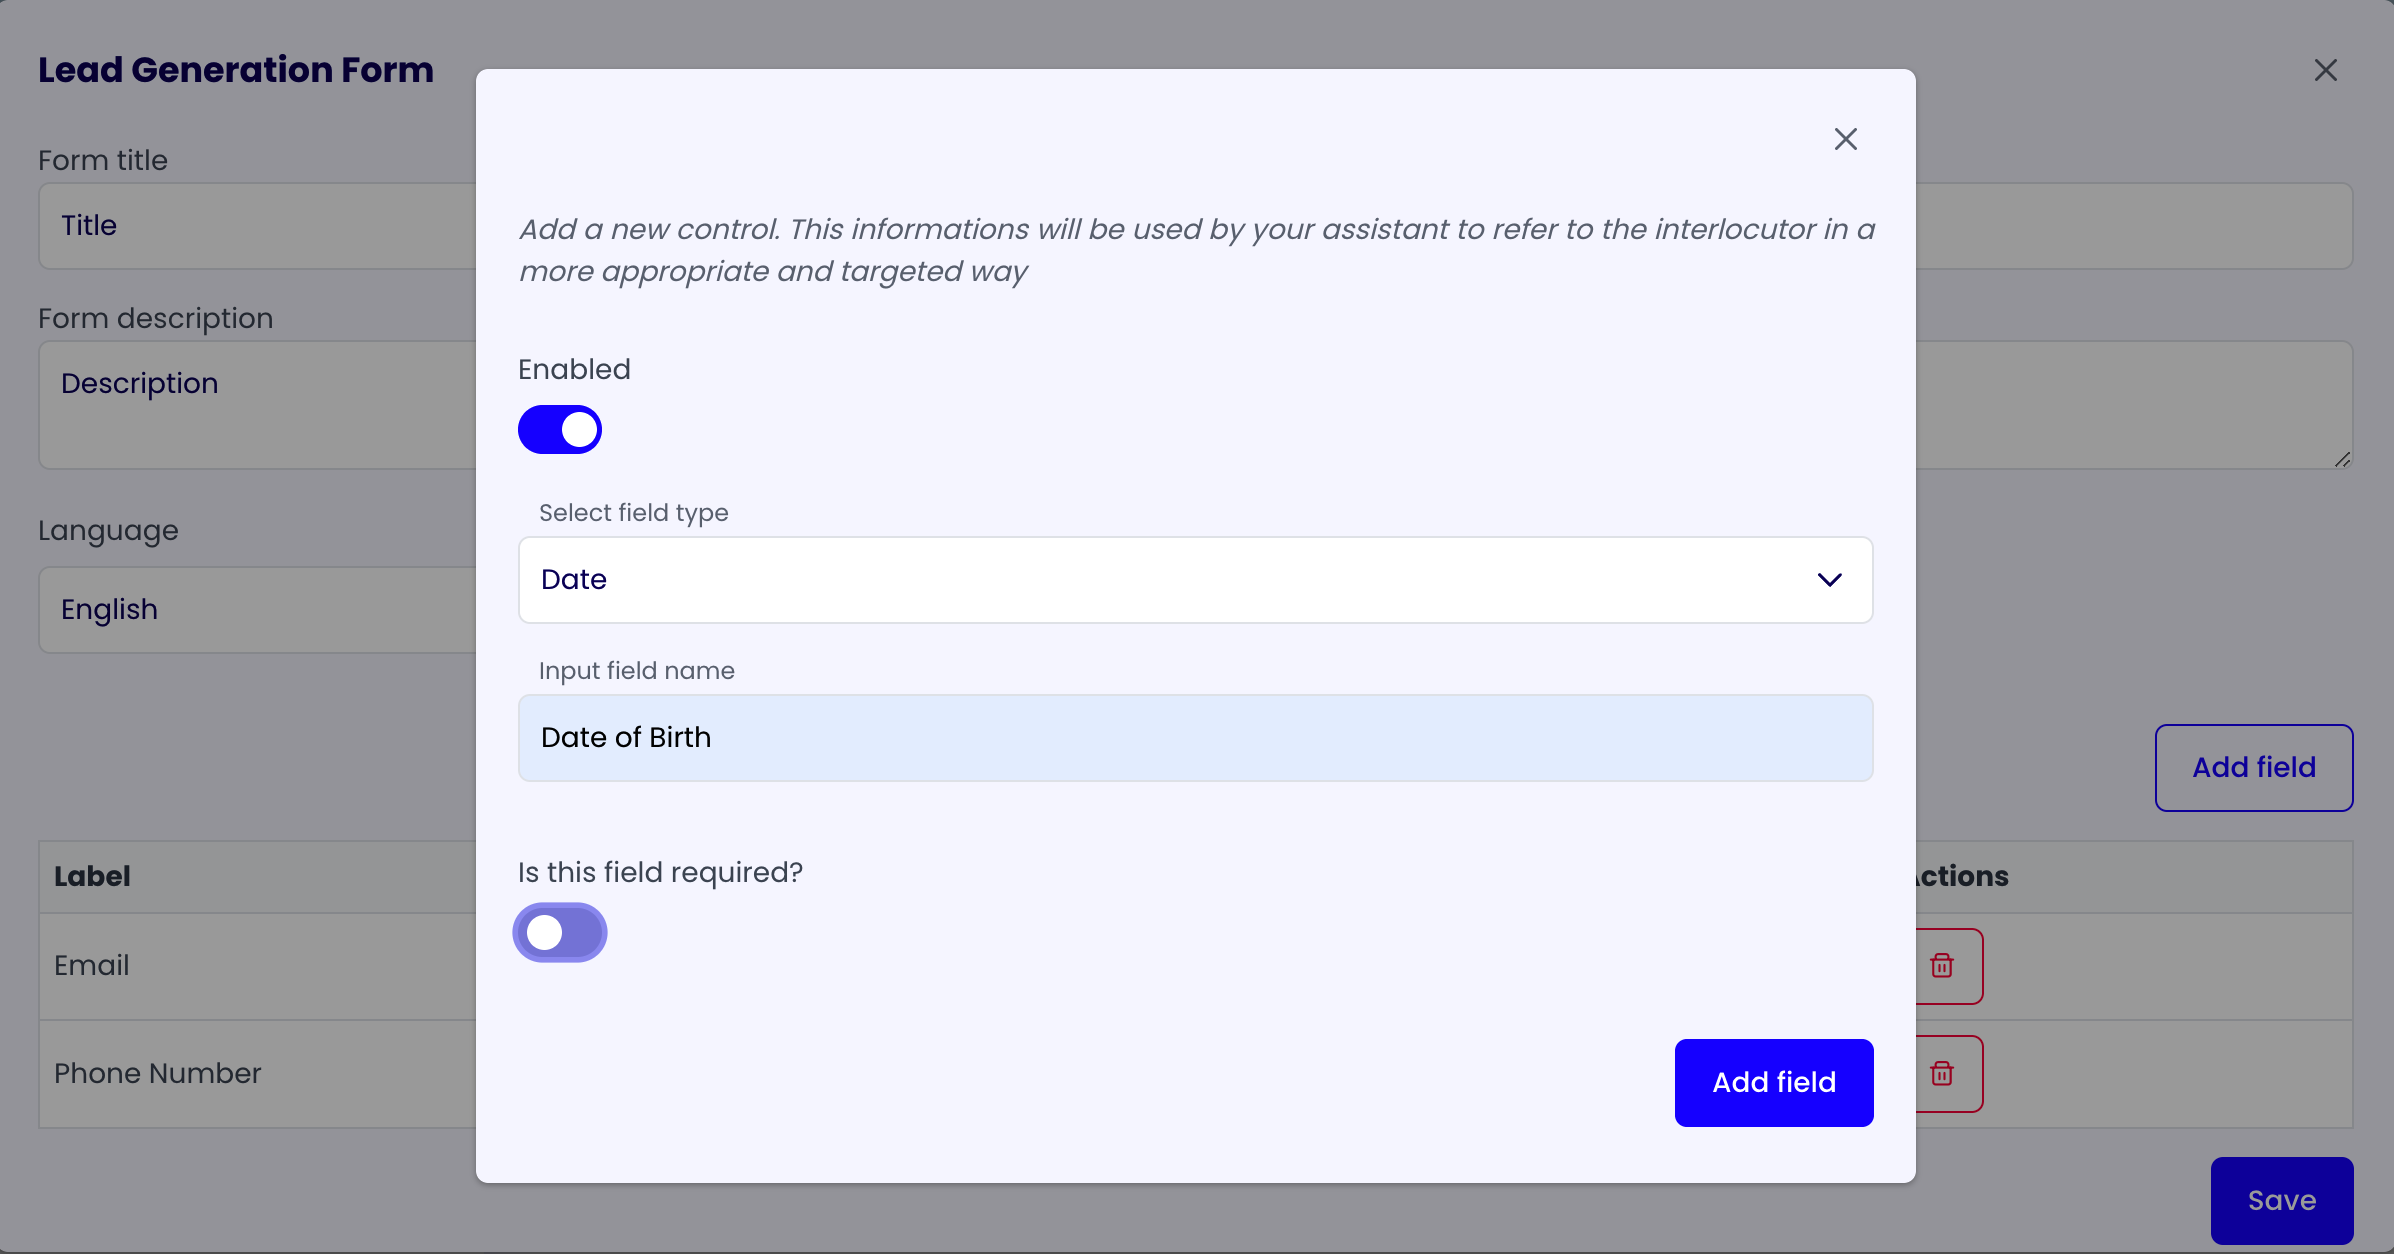
After these fields there is an 'Add Field' button. Click on it to open a dialog that will let you add a new field to the form.
At the bottom of the lead generation form you can see the list of fields that will be displayed to the user and in the right corner there is the 'Save' button.
Lead Generation Form Field Configuration
In the Add Field dialog you can choose the type of the field, the label and if it's required. The available types are:
- Text
- Number
- Date
If you need to delete a field, click on the trash icon at the right of the field, in the list of fields inside the lead generation form.
New Lead Email Notification
Configure Notifications when a new Lead is Generated
Click on 'Configure new lead email notification' to configure the email notification.
New Lead Email Notification Form Configuration
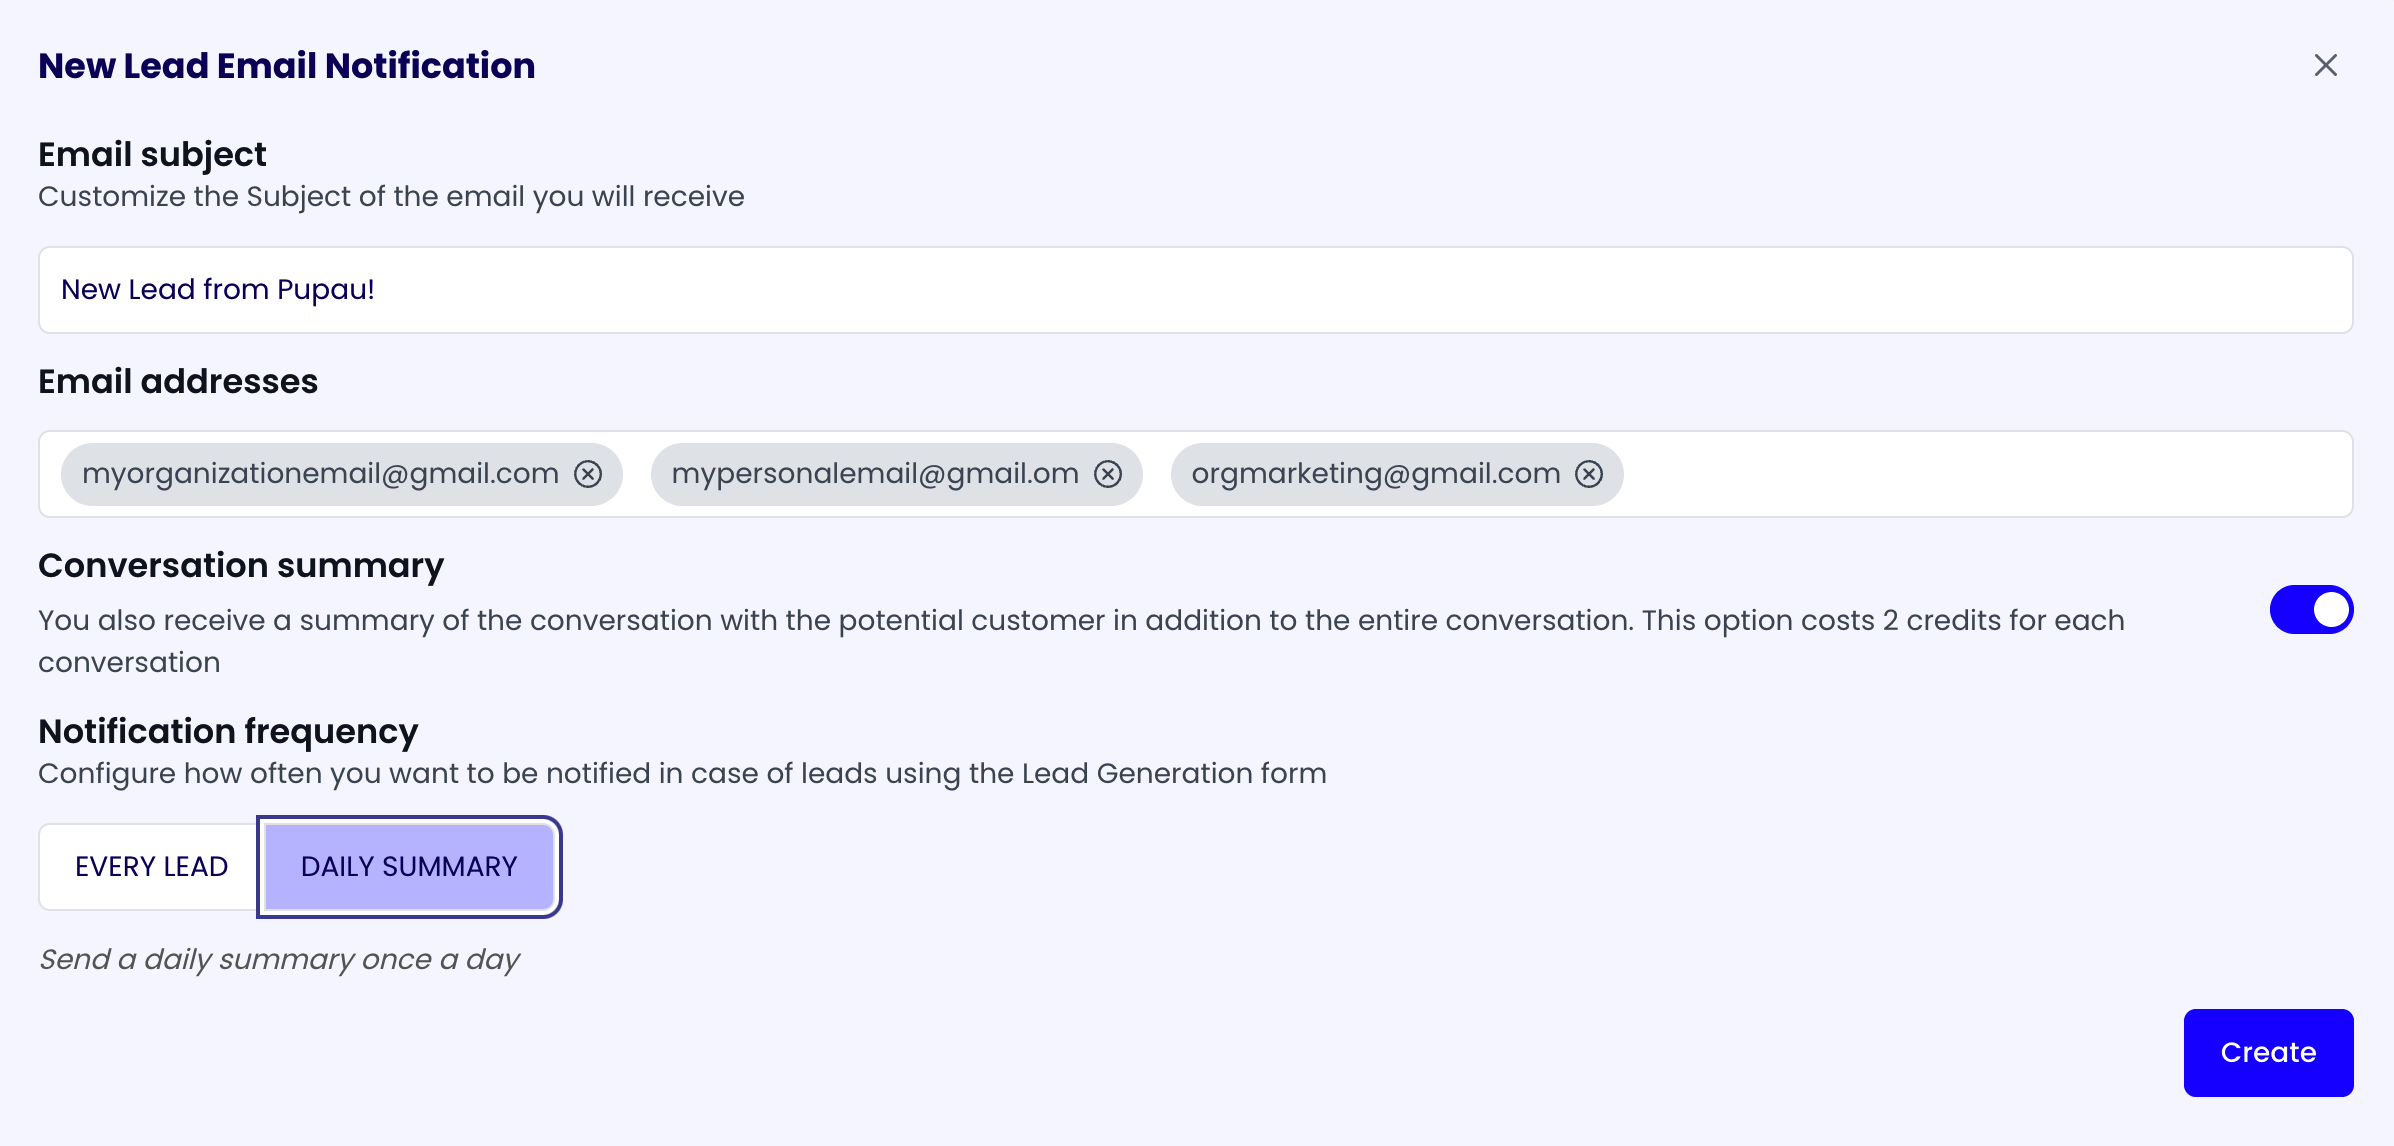
When you open the new lead email notification form, you will see the following fields:
- Email subject
- Email addresses
- Conversation summary
- Notification frequency
At the bottom right corner there is the 'Create' button. Click on it to create or update the new lead email notification.
Email addresses
The email addresses that will receive the new leads email notifications. You can add multiple email addresses.
Conversation summary
If enabled, the new lead email notification will include a summary of the conversation with the potential customer in addition to the entire conversation. This option costs 2 credits for each conversation.
Notification frequency
You can choose the frequency of the notification. You can choose to send one daily notification or at every new lead. With the every new lead option, the notification will be sent within an hour after the lead is generated.
Conversation Actions
Conversation actions appear to the user as suggestions to start or continue a conversation
Click on 'Configure conversation actions' to configure the conversation actions.
Conversation Actions Form Configuration
When you open the conversation actions form, you will see the 'Add' button and the list of the existing conversation actions.
Click on the 'Add' button to add a new conversation action.
Conversation Action Configuration
When you open the add conversation action form, you will see the following fields:
- Title
- User label
- User message
Title
The title of the conversation action. It's not visible to the user.
User label
The label of the conversation action that will be displayed to the user.
User message
The message of the conversation action that will be displayed to the user. This is the message that the user will send to the assistant when the conversation action is used.
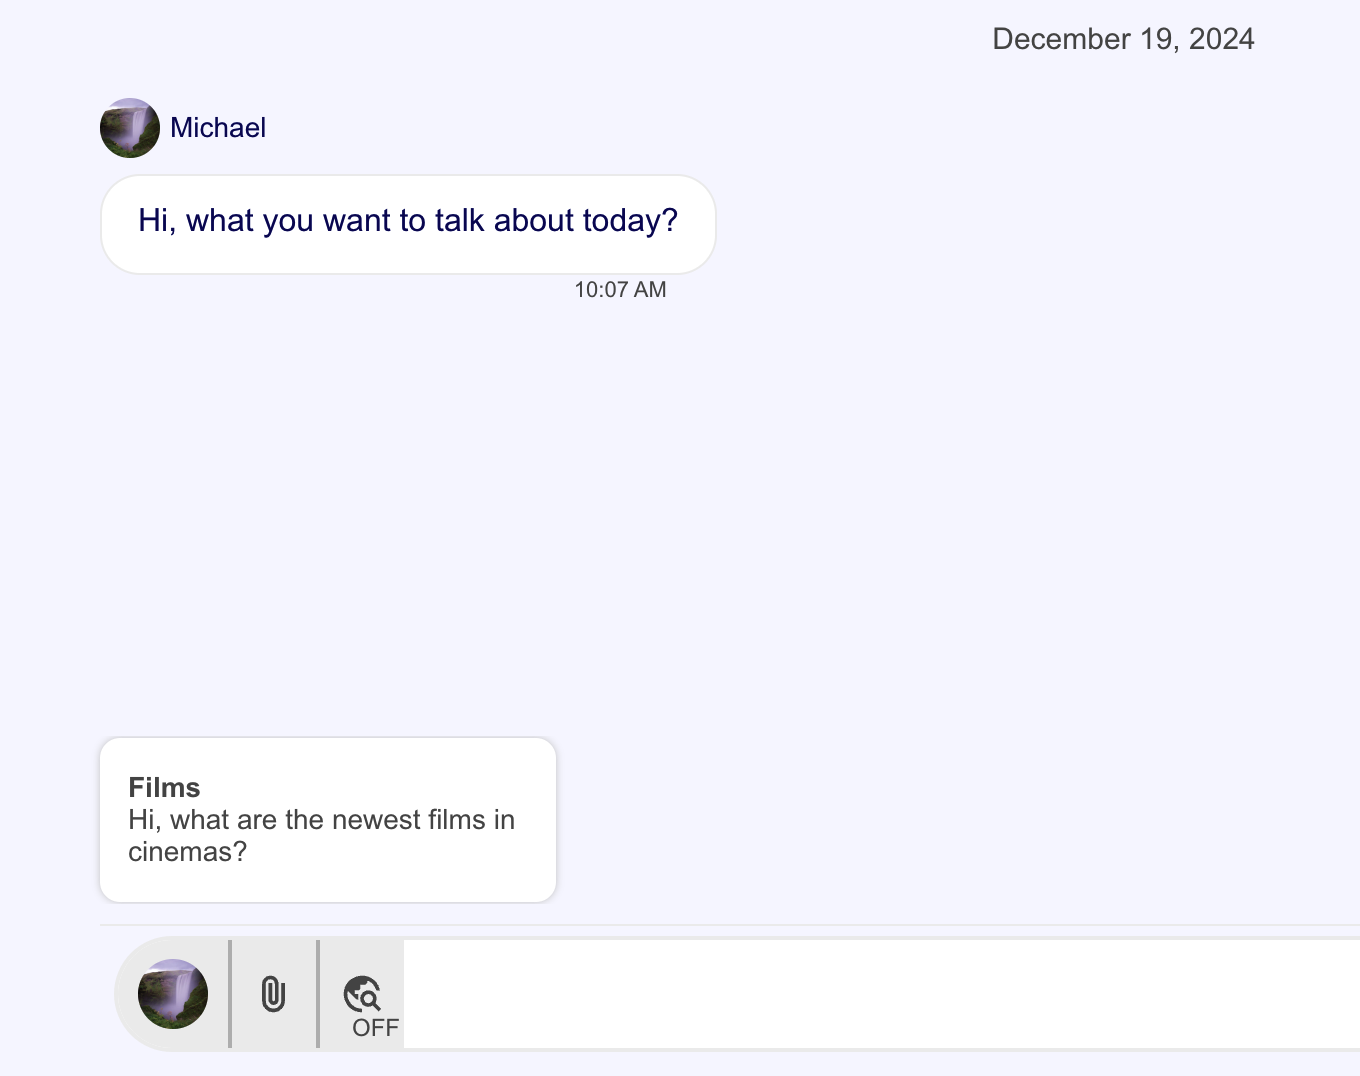
Example of a conversation action with User label "Films" and user message "Hi, what are the newest films in cinemas?".
Pipeline Actions
Set up pipelines execution when a certain event occurs.
Click on 'Configure pipeline actions' to configure the pipeline actions.
Pipeline Actions Form Configuration
When you open the pipeline actions form, you will see the 'Add' button and the list of the existing pipeline actions.
Click on the 'Add' button to add a new pipeline action.
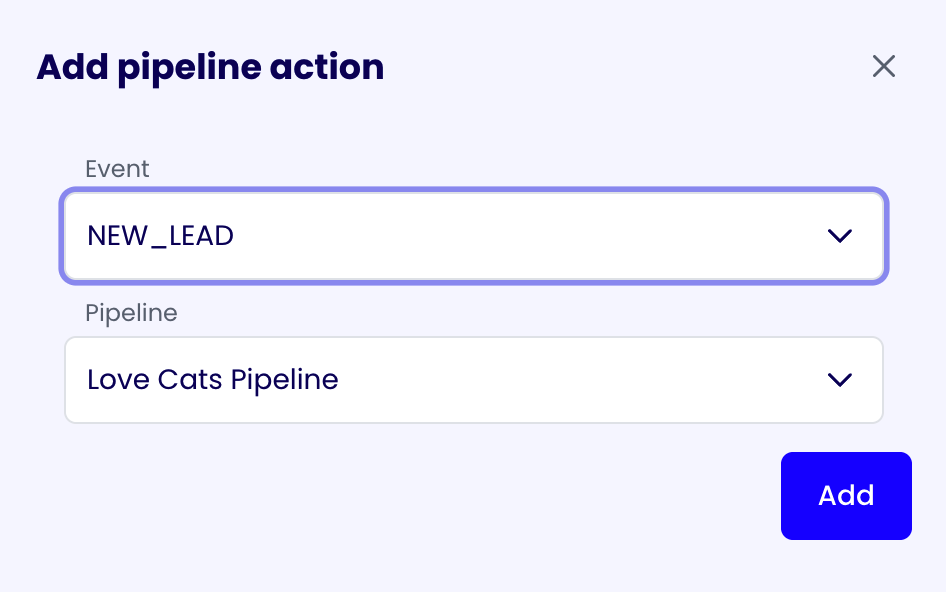
Pipeline Action Configuration
When you open the add pipeline action form, you will see the following fields:
- Event
- Pipeline
Event
The event that will trigger the pipeline execution. These are the available events:
- New Lead
- Message
- Conversation End
Pipeline
The pipeline to execute when the event occurs.