Example: Document Analyzer
In this guide, we'll create a pipeline that analyzes a document and extracts the main topics.
Pipeline Configuration
First of all, we need to create a new pipeline. Since this pipeline will be used to analyze documents, we need to edit the input format to allow files upload.
To do this, click on the 'Edit Pipeline' button on the top right corner of the screen and in the 'Input Format' field, select the 'File' option and 'Save'.
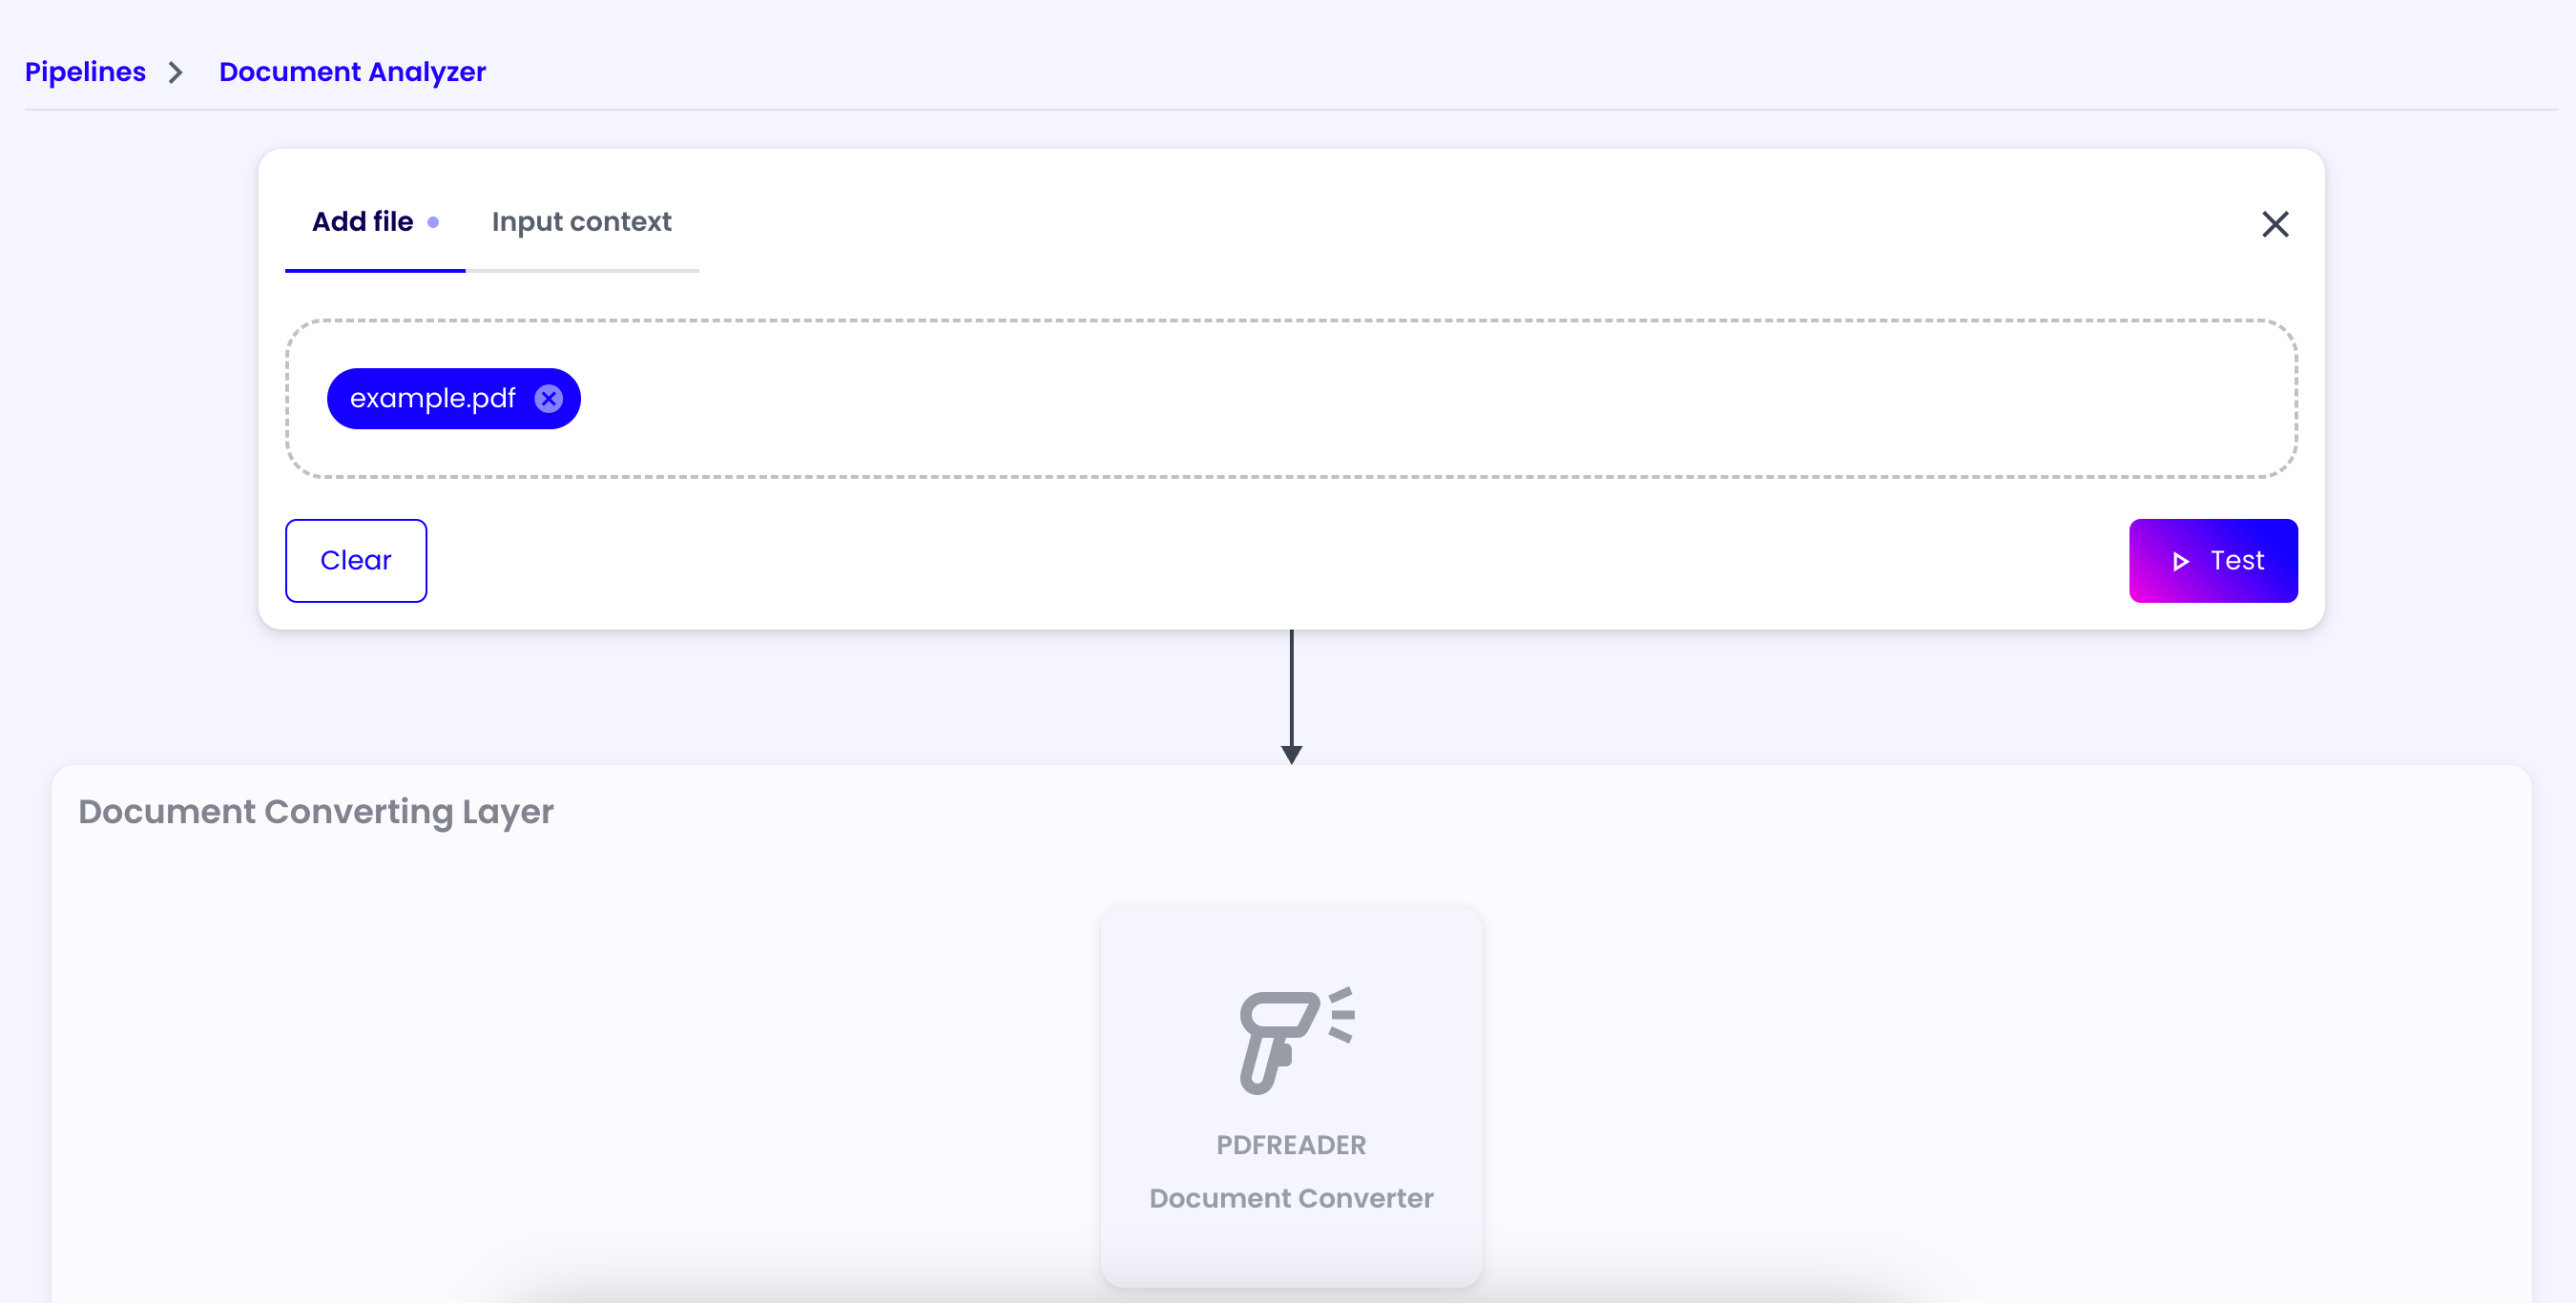
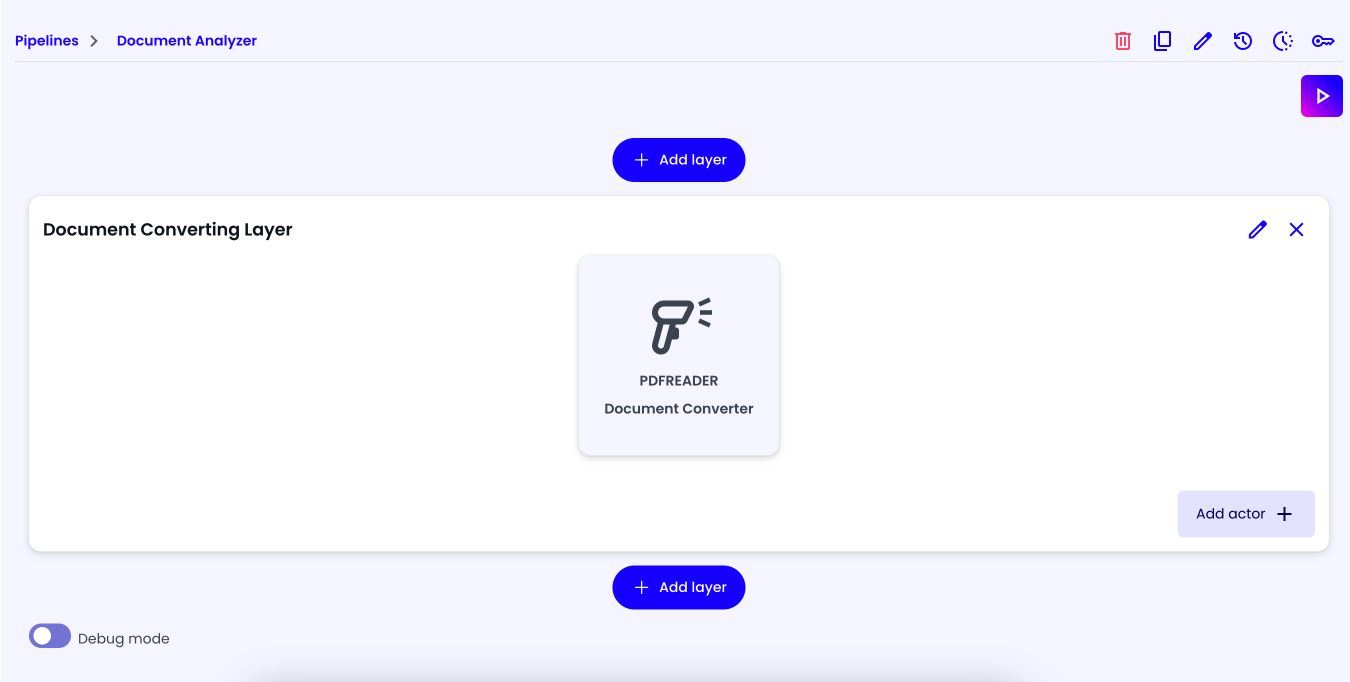
Document Converting Layer
Afterward, we need to add our first layer to the pipeline. This layer will be used to convert the file to an image, so that it will be easier to elaborate for our AI assistants.
Click on the 'Add Layer' button at the upper center of the screen and give it a name of your choice (e.g. 'Document Converting Layer').
PDF Reader Actor
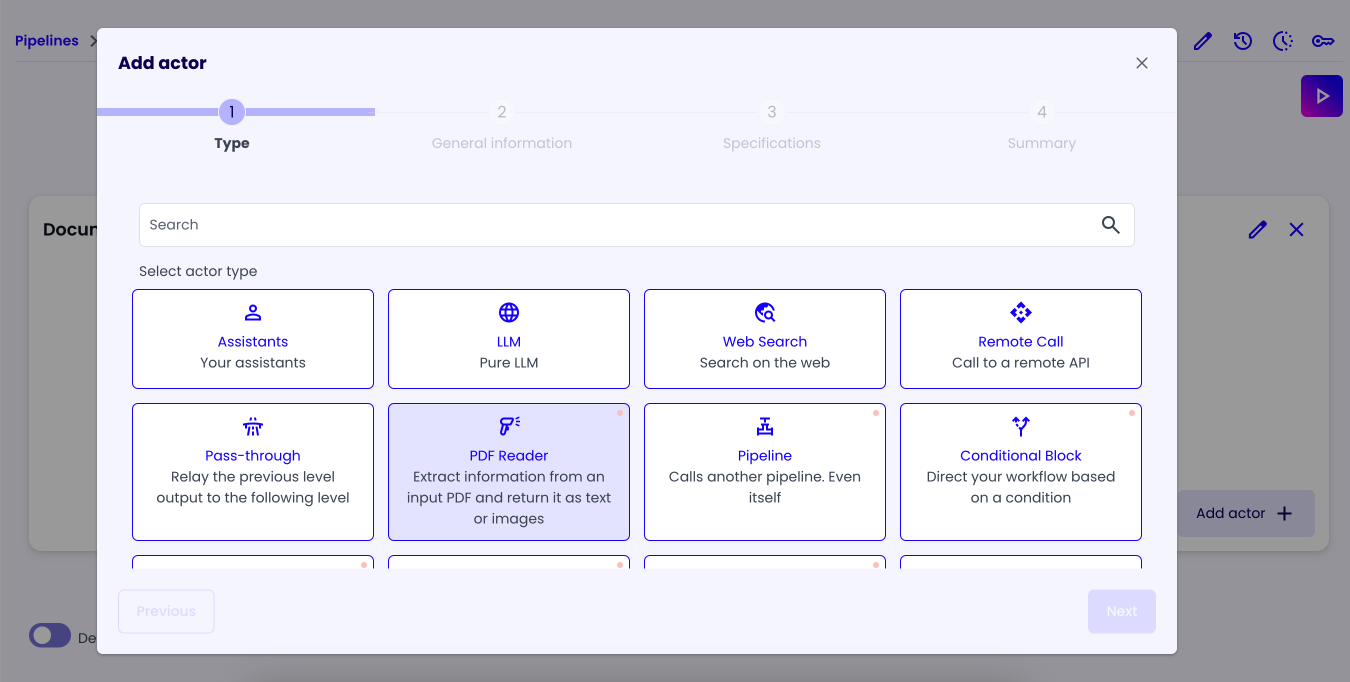
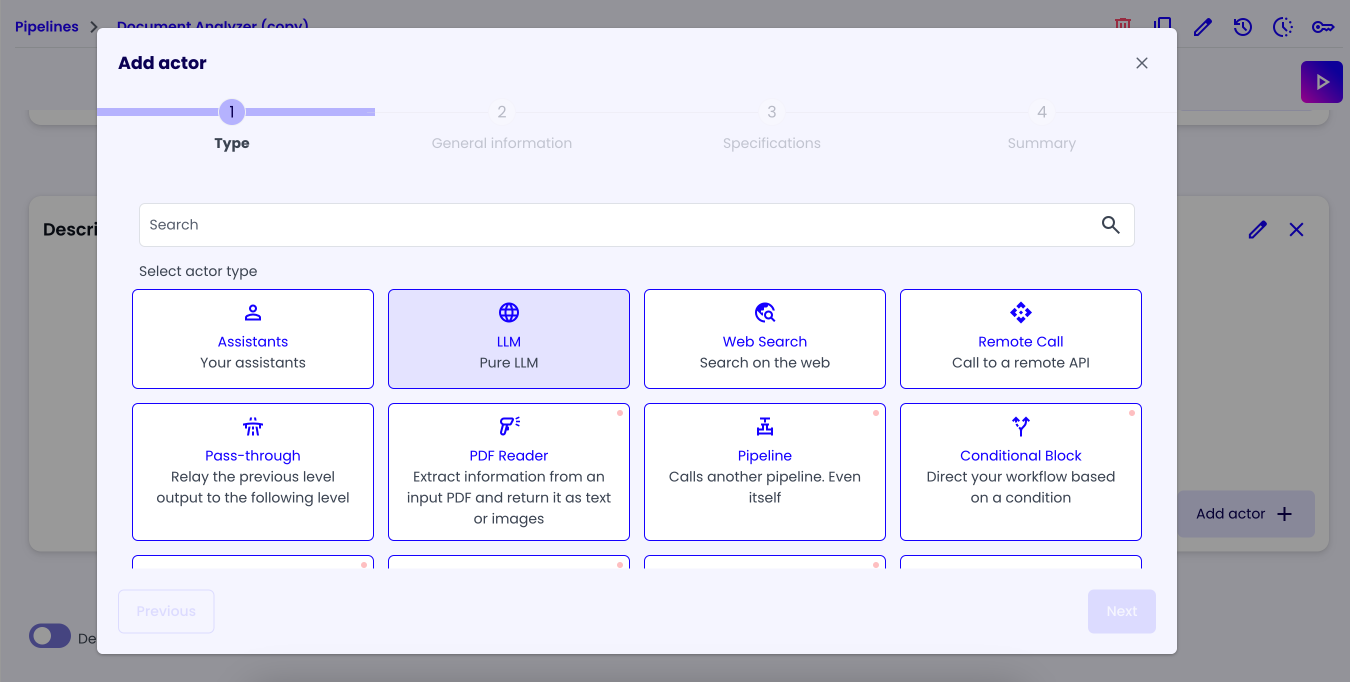
Then, we need to add an actor that will convert the file to an image. Click on the 'Add Actor' button at the bottom right corner of the layer and select the 'PDF Reader' actor.
In the 'General Information' tab, give it a name of your choice (e.g. 'Document Converter') and select the 'File' option in the 'Input Format' field.

In the 'Specifications' tab, we can configure the PDF Reader actor custom parameters:
- Start Page: The number of the page to start reading from.
- End Page: The number of the page to finish reading.
- Max Pages: The maximum number of pages to read.
- Output Format: The format of the output image:
- Text: A text file with the content of the document.
- Image: An image of the document.
- Text and Image: A text file with the content of the document and an image of the document.
- Screenshot per page: A screenshot of each page of the document.
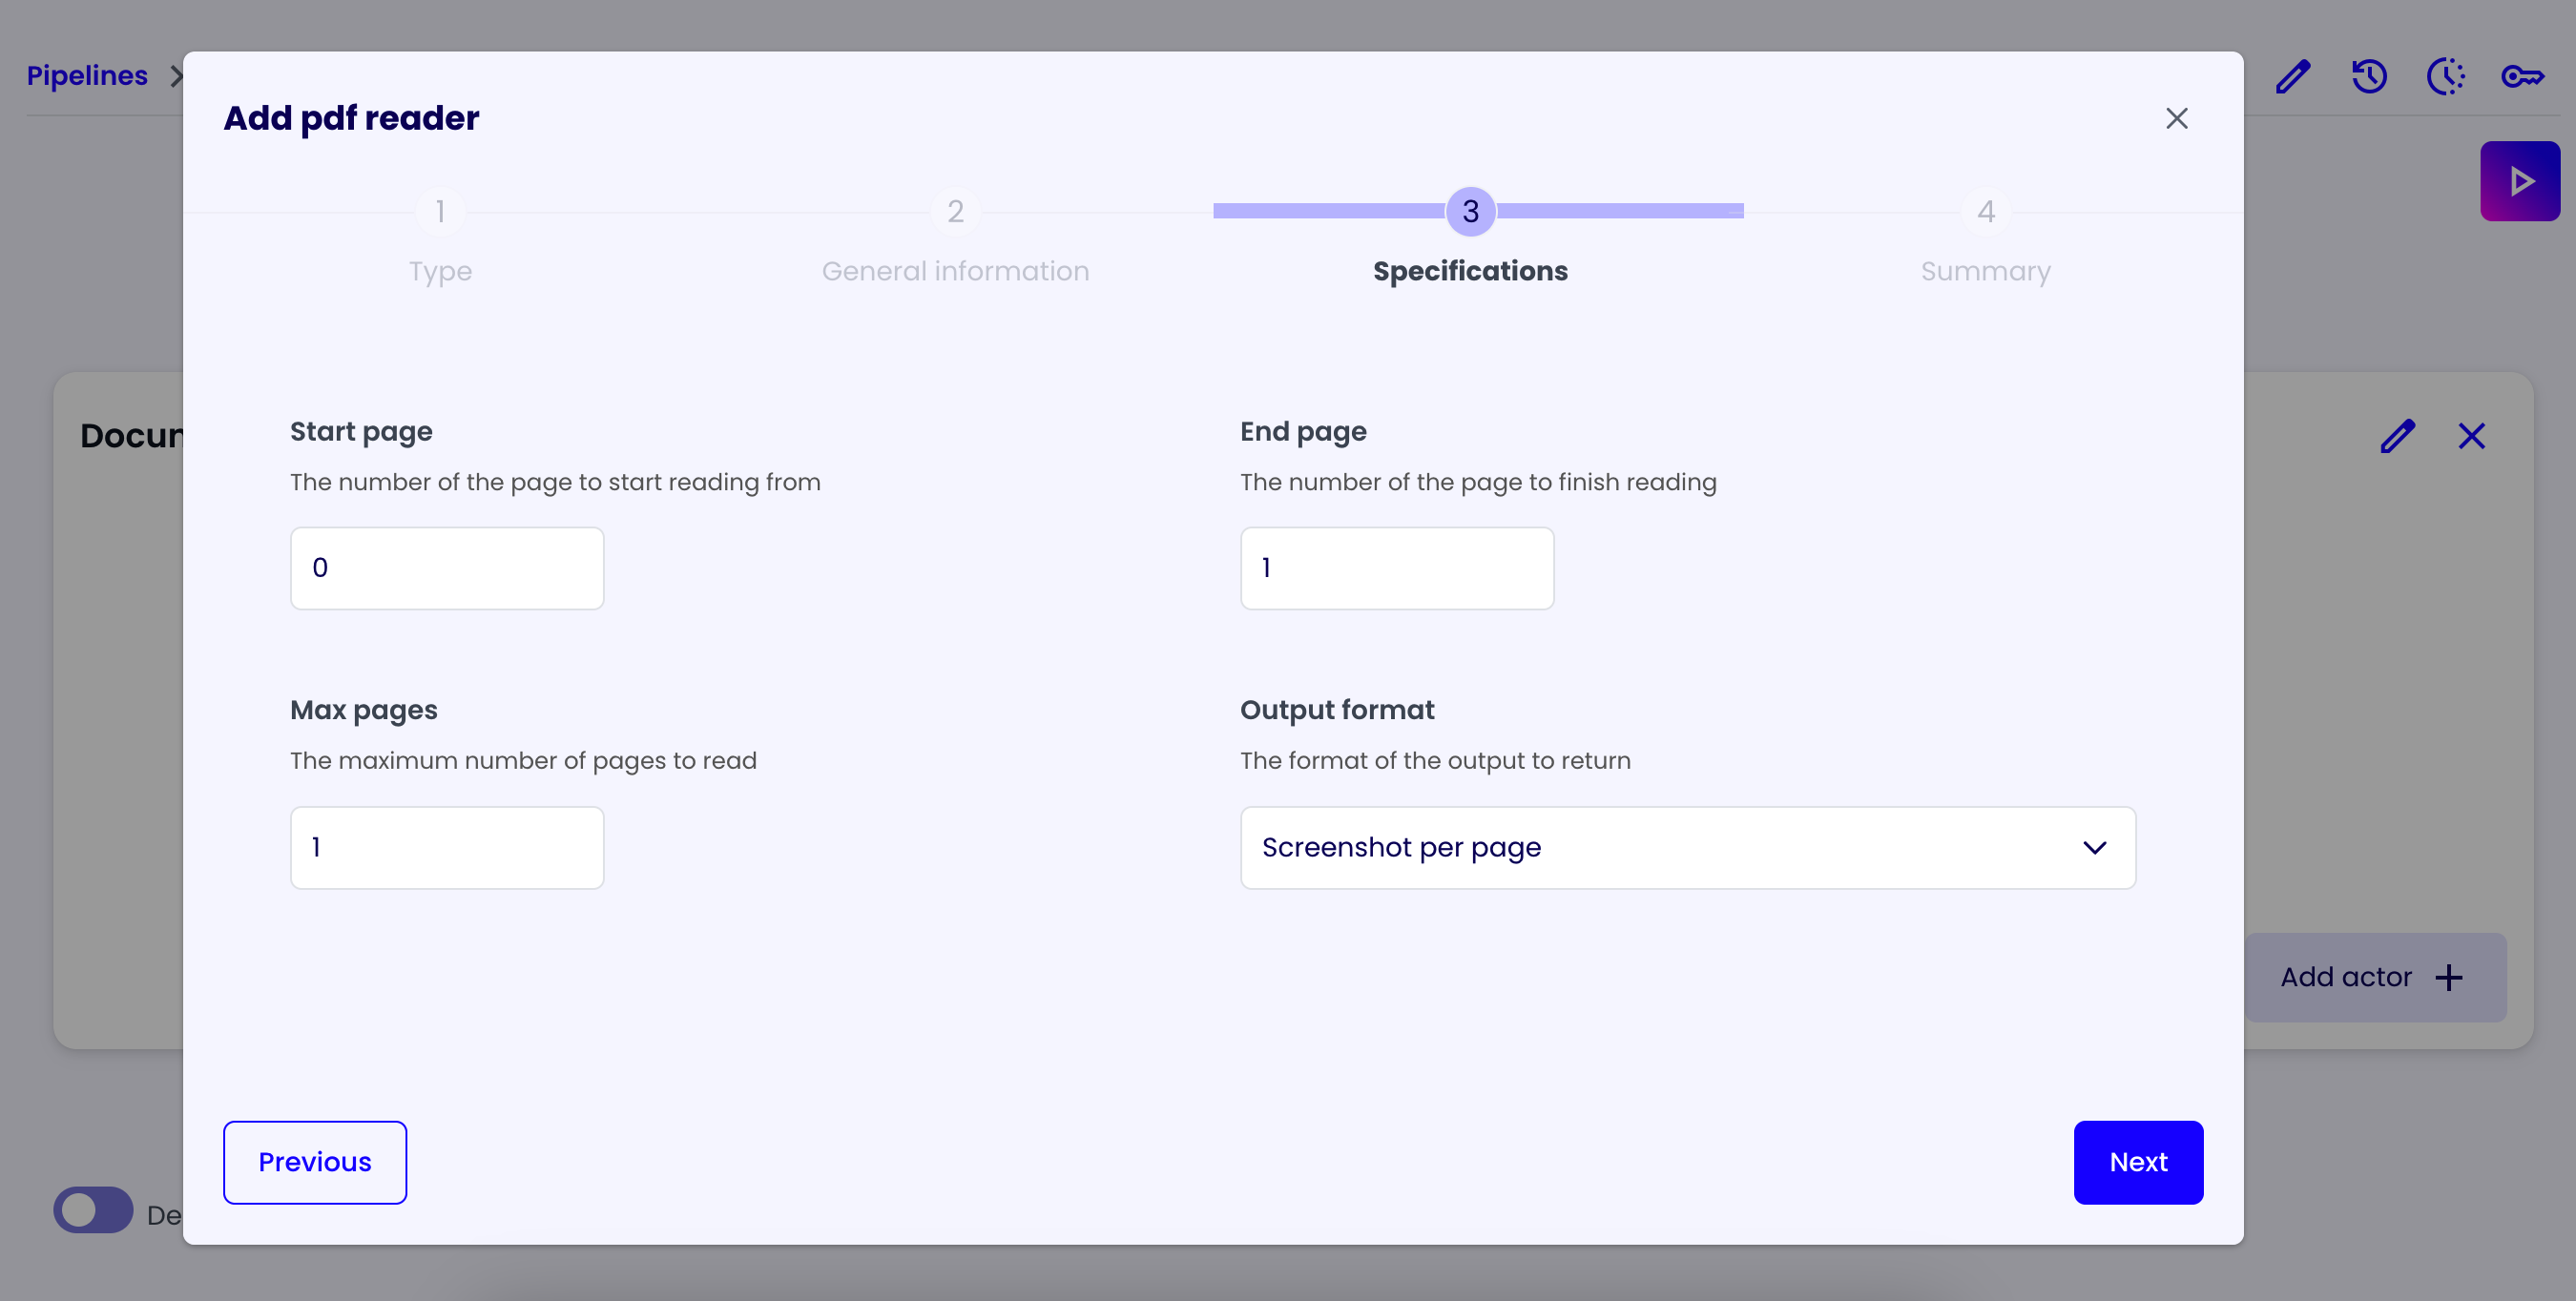
For this example, we'll select the 'Screenshot per page' option.
Afterward, click on the 'Next' button to go to the 'Summary' tab and click on the 'Next' button again to save the actor.
If you have done everything correctly, you should see the following screen:
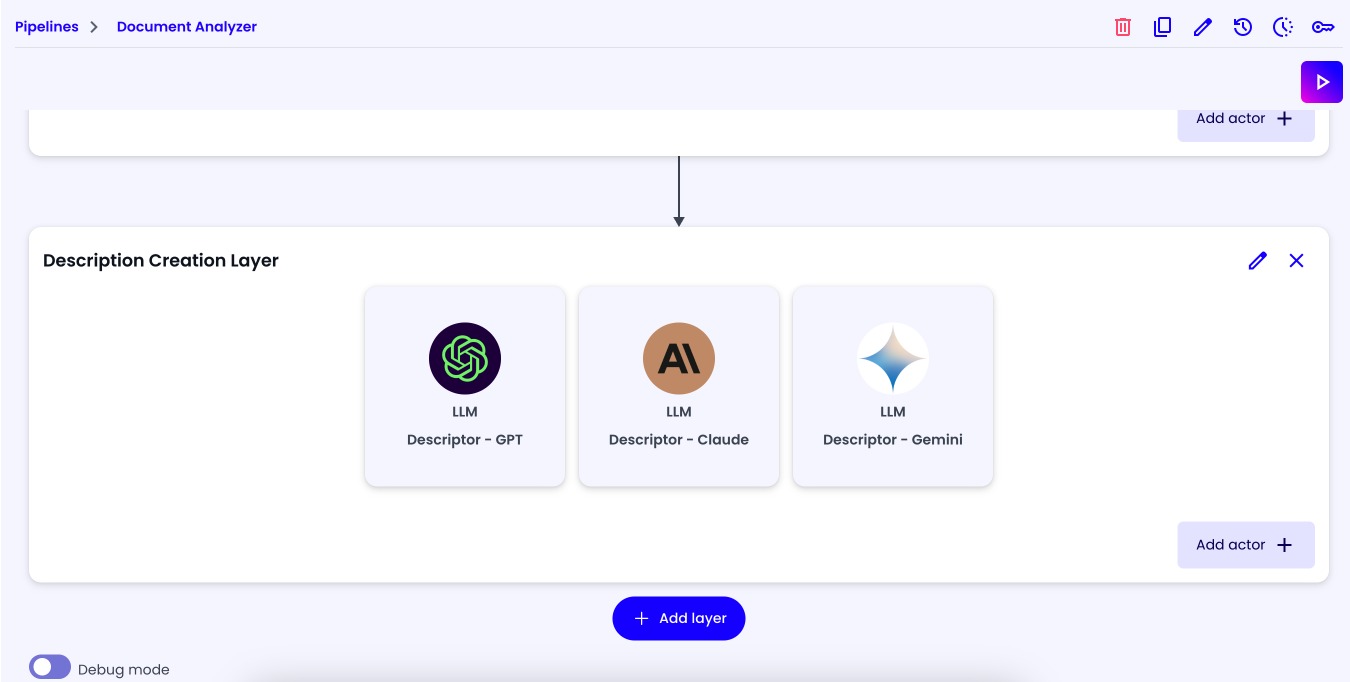
Description Creator Layer
Let's create the second layer of our pipeline. This layer will be used to generate various descriptions of the document. In this example we'll generate three descriptions using three different LLMs to get different perspectives, you can use more or less LLMs depending on your needs.
Descriptor Actors
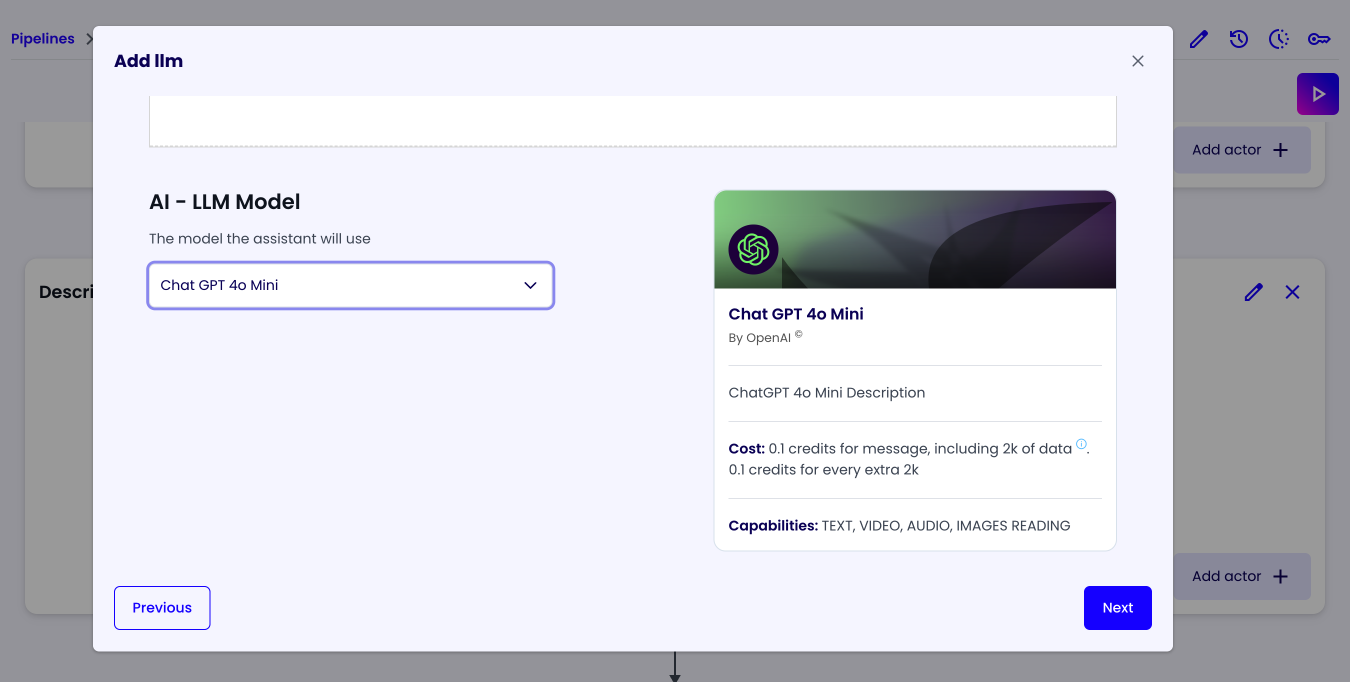
Let's add an actor to the layer. Click on the 'Add Actor' button at the bottom right corner of the layer and select the 'LLM' actor.
In the 'General Information' tab, give it a name of your choice (e.g. "Descriptor <LLM Name>") and in 'Input Format' select the 'File' option, since the previous layer will output a file.
In the 'Specifications' tab, we can configure the LLM actor behavior. Selects Custom Prompt and let's use a simple prompt to tell the actor to describe the document:
Describe the image in the context as best as you can. The description must be exhaustive and professional. The image is a business document.

Lastly choose the LLM you want to use (e.g. 'GPT 4o Mini') and click on the 'Next' button to go to the 'Summary' tab and click on the 'Next' button again to save the actor.
Since we want multiple descriptions, we can add other actors with the same configuration but with different LLMs. To do this simply 'Duplicate' the actor how many times you want and change the LLM to the one you want to use.
To duplicate an actor, hover over the actor and click on the 'Duplicate' button on the top right corner of the actor.

If you have done everything correctly, you should see the following screen:
Description Finalization Layer
Let's add a last layer, where we'll elaborate all the descriptions into a single, more structured description.
Description Finalizer Actor
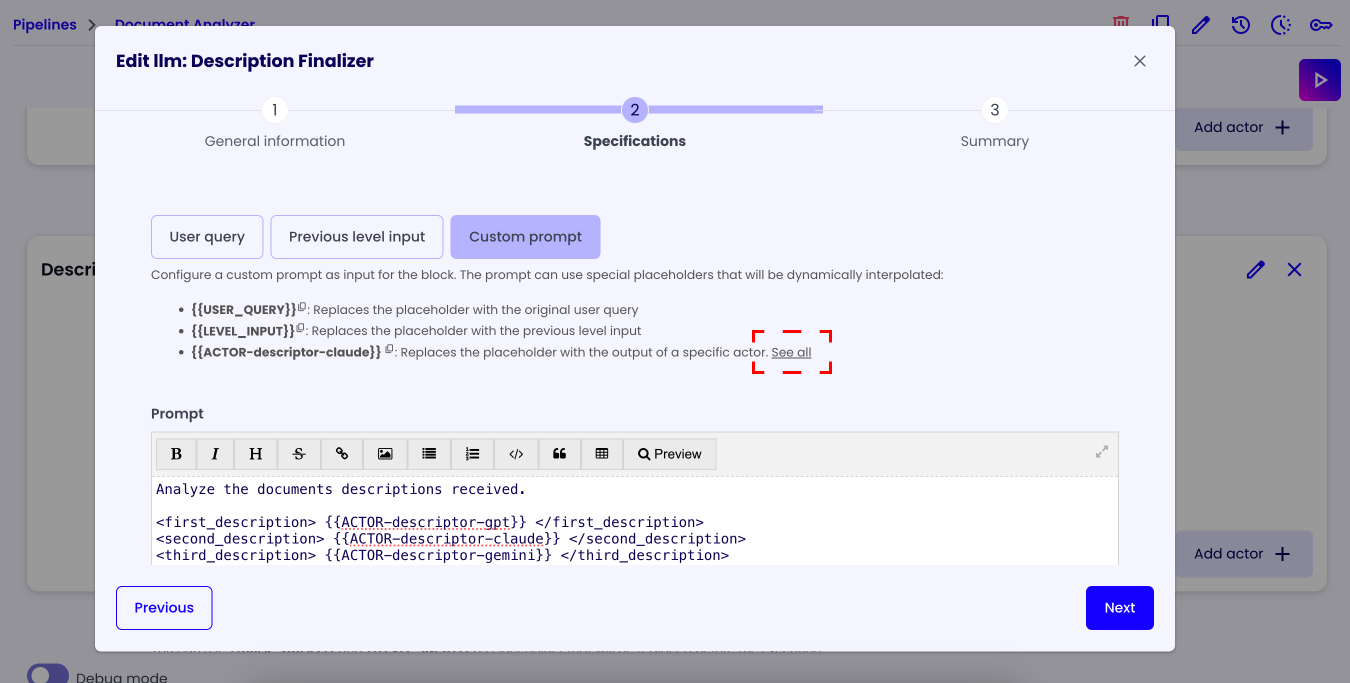
Add a new LLM actor to the layer, give it a name of your choice (e.g. 'Description Finalizer') and in the 'Specifications' tab, select the Custom Prompt option.
Prompt
In the 'Prompt' field let's give the actor directions on what data to use, let's use the following prompt:
Analyze the documents descriptions received.

<first_description> {{ACTOR-descriptor-gpt}} </first_description>
<second_description> {{ACTOR-descriptor-claude}} </second_description>
<third_description> {{ACTOR-descriptor-gemini}} </third_description>

These are multiple descriptions of the same document, analyze them and make a unique, exhaustive and professional description.
The reason there are multiple description is so that you can extract the best possible document description from multiple interpretations.
Actor Reference via ID
Make sure to change the various ids 'ACTOR-descriptor-model' to the ids of your descriptor actors.
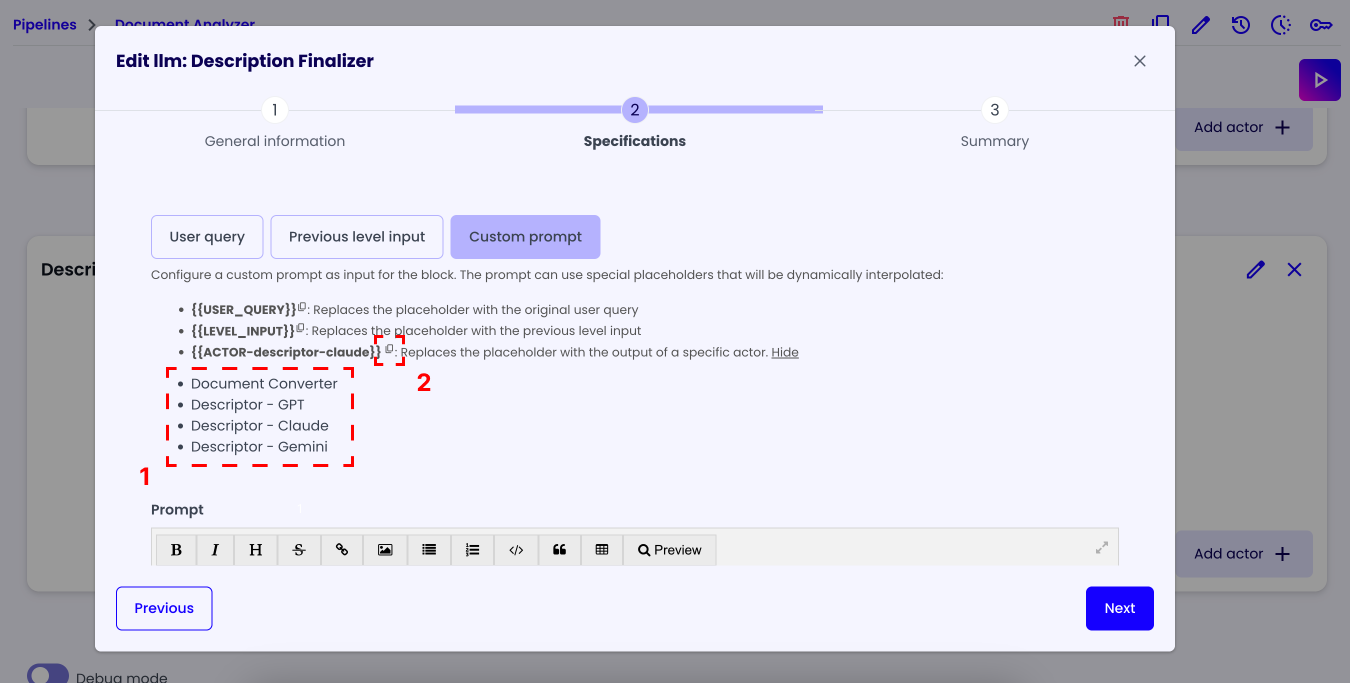
To easily find the ids of your actors, you can click on the 'See all' text in the placeholder guide section.
Then click on the actor you want the id of. After that the id will appear in the placeholder guide, and you can press the copy button to copy it.
System Prompt
In the 'System Prompt' field we'll give the actor more information about how to structure the description it will output:
<instructions>
<identity>
You are a professional assistant that specializes in analyzing documents and in writing reports about them. Your reports are always professional, exhaustive and precise.
</identity>
<role>
You will receive multiple reviews of the same document. Your job is to analyze all the reviews and craft the best possible report about that document. The reason there are multiple reviews is so that you can create the best possible report from multiple review interpretations.
</role>
<report_structure>
The report **MUST** have the following structure:
{
  "title": "Here goes the title of the document",
  "topics": ["topic 1", "topic 2"],
  "language": "The language of the document",
  "description": "Here goes the description of the document"
}
<report_structure>
<report_output_example>
{
  "title": "Graduates of X University 2025!",
  "topics": ["school", "education"],
  "language": "EN",
  "description": "Here is the list of graduates of the year 2025 from X University..."
}
</report_output_example>
</instructions>
Afterward, select the desired LLM and click on the 'Next' button to go to the 'Summary' tab, click on the 'Next' button again to save the actor.

Testing the Pipeline
Now the only thing left to do is to test the pipeline. Click on the 'Play' button at the top right corner of the page, upload a file and click on the 'Test' button.