Tool Use - API
Overview
Using the API Tool Use, your Agent will call the desired API when the right conditions are met. You can customize the API type, header, parameters and much more.
Configuration
Basic fields
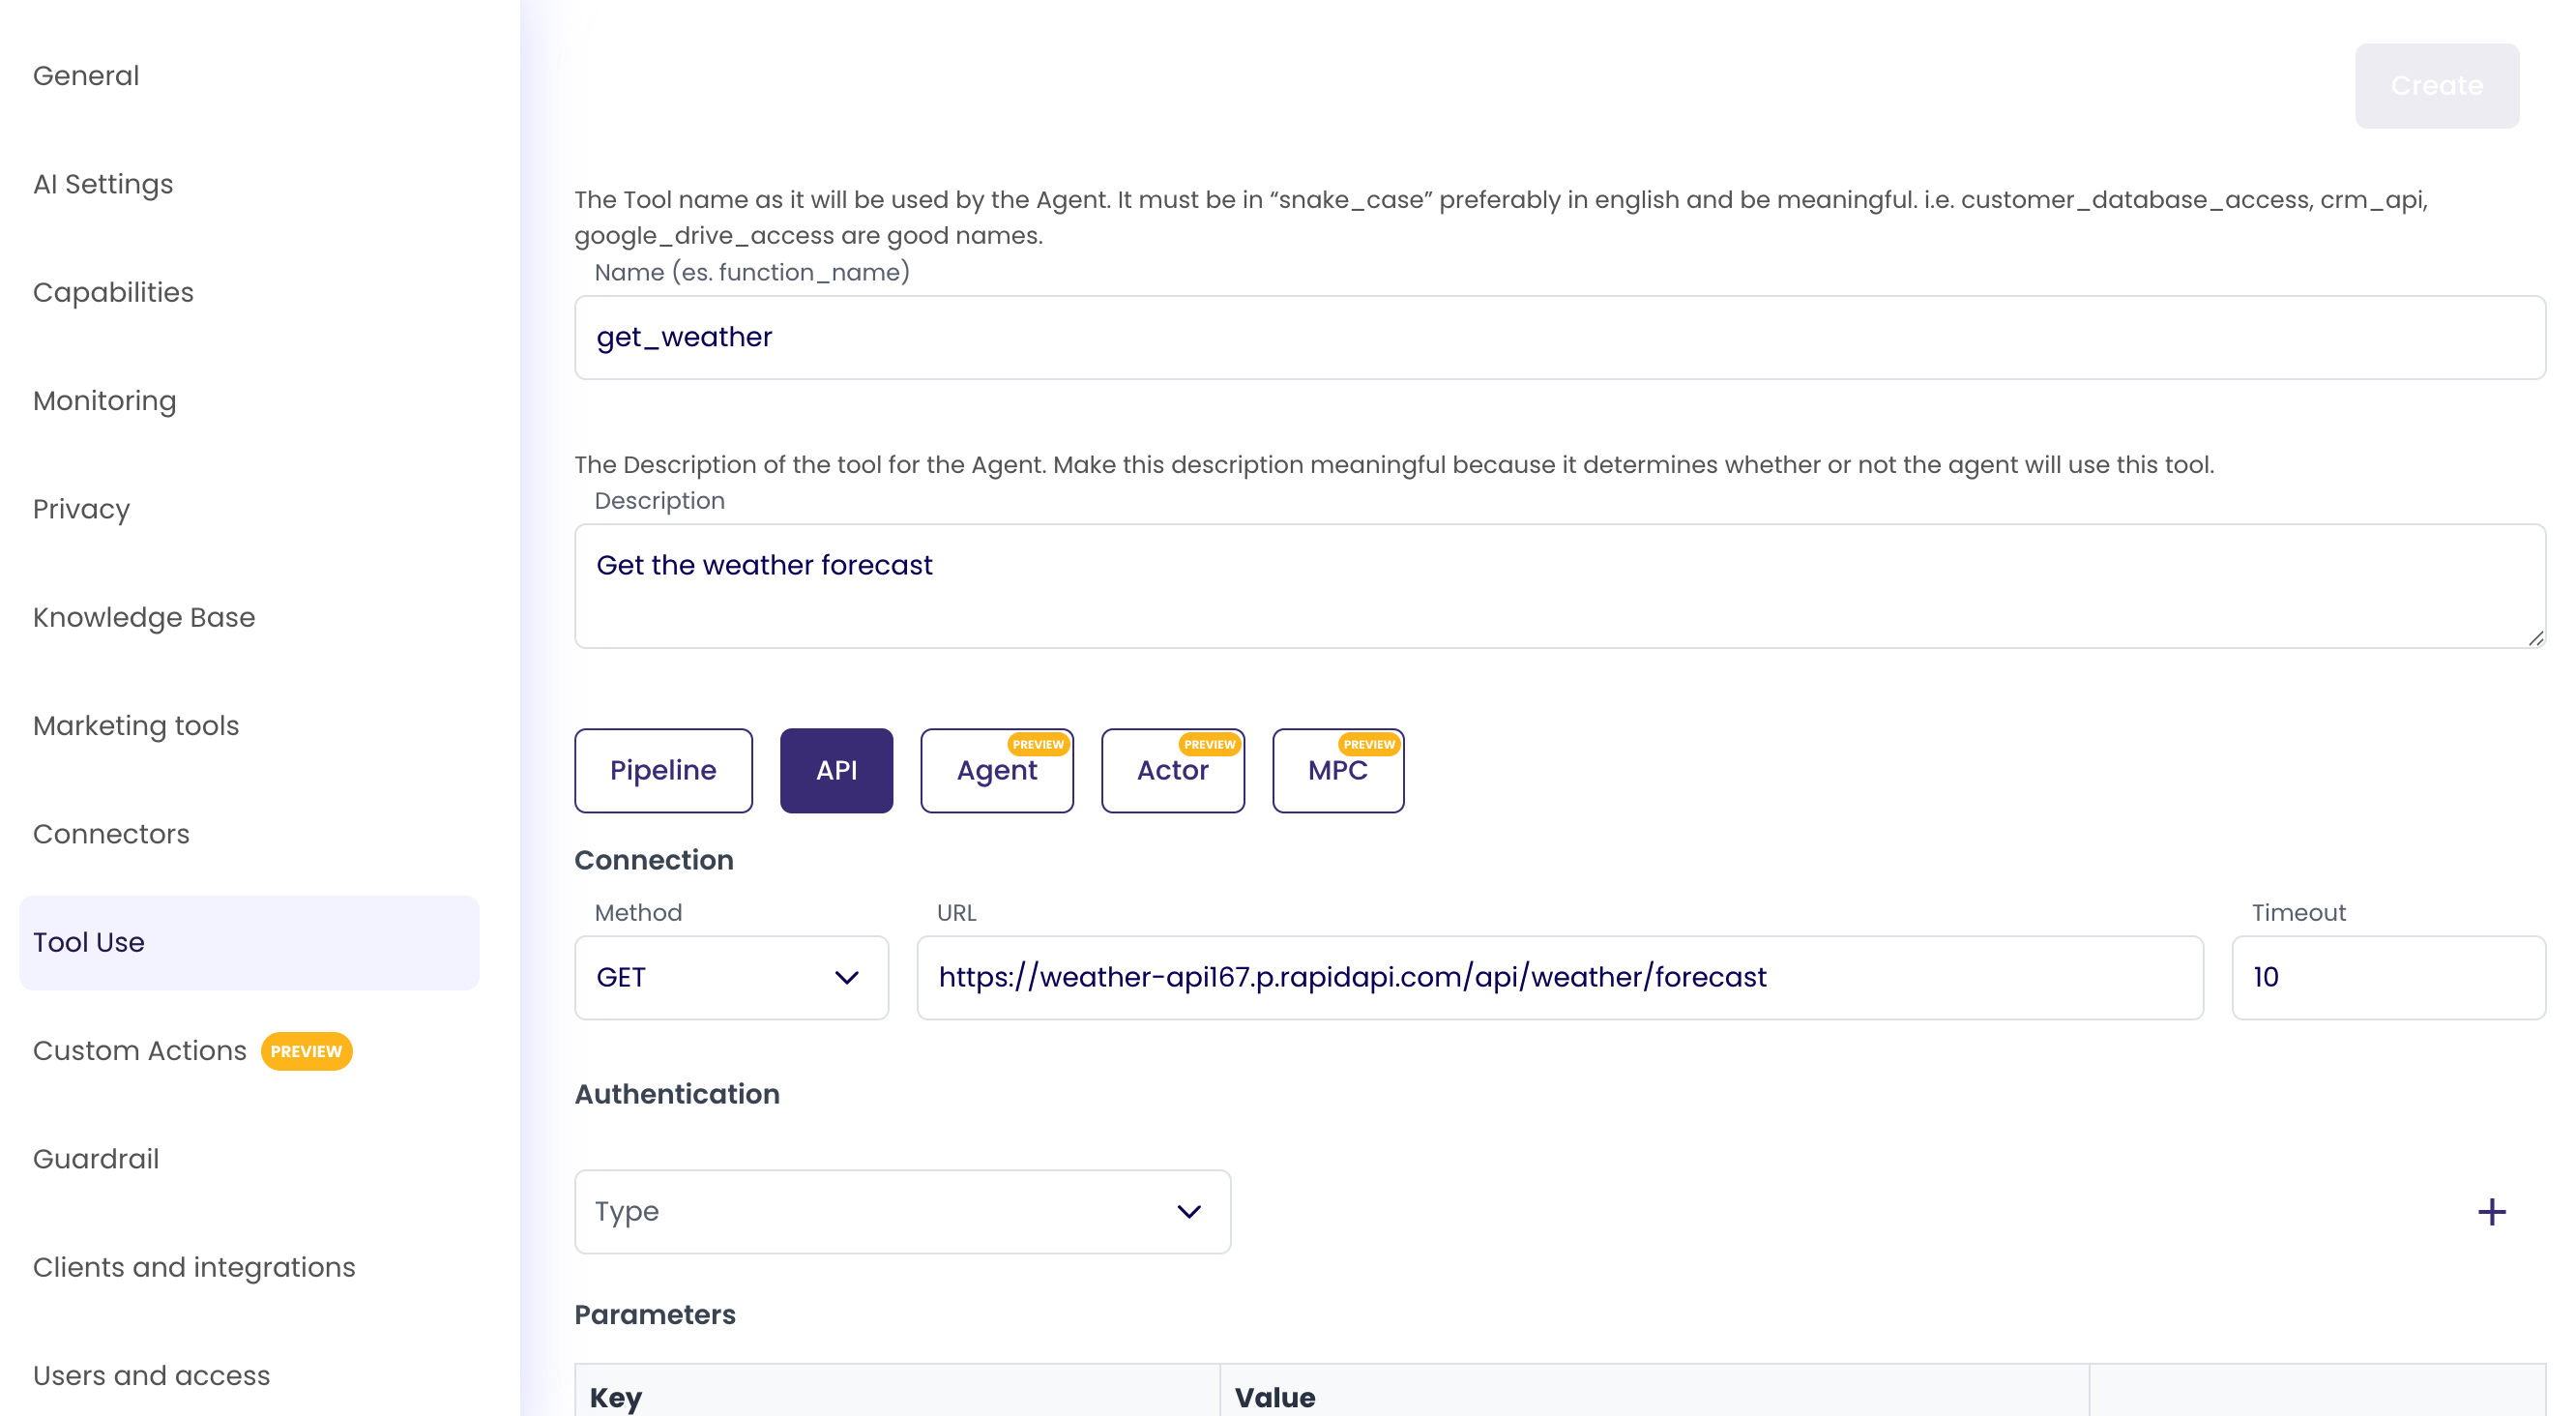
Let's configure a simple API Tool Use, for this example we will use a free weather API from RapidAPI.com.
Write a meaningful name and description to make sure the Agent understands when to use this tool.
Choose the 'API' option to access the API-specific settings like API method, URL, headers, parameters and more.
Connection
In the Connection section we can choose the API method from:
- GET
- POST
- PUT
- PATCH
- DELETE
Afterward we can choose the URL (endpoint) of the API and the request timeout (in milliseconds)
Authentication
In the Authentication section we can configure which type of auth we want from:
- None
- Header
- Query String
If Header or Query String are chosen, parameters can be added to set them up. Each parameter will have a key and a value. When you are done setting the key and value of the parameter, press the 'Add' button on the right.

Parameters
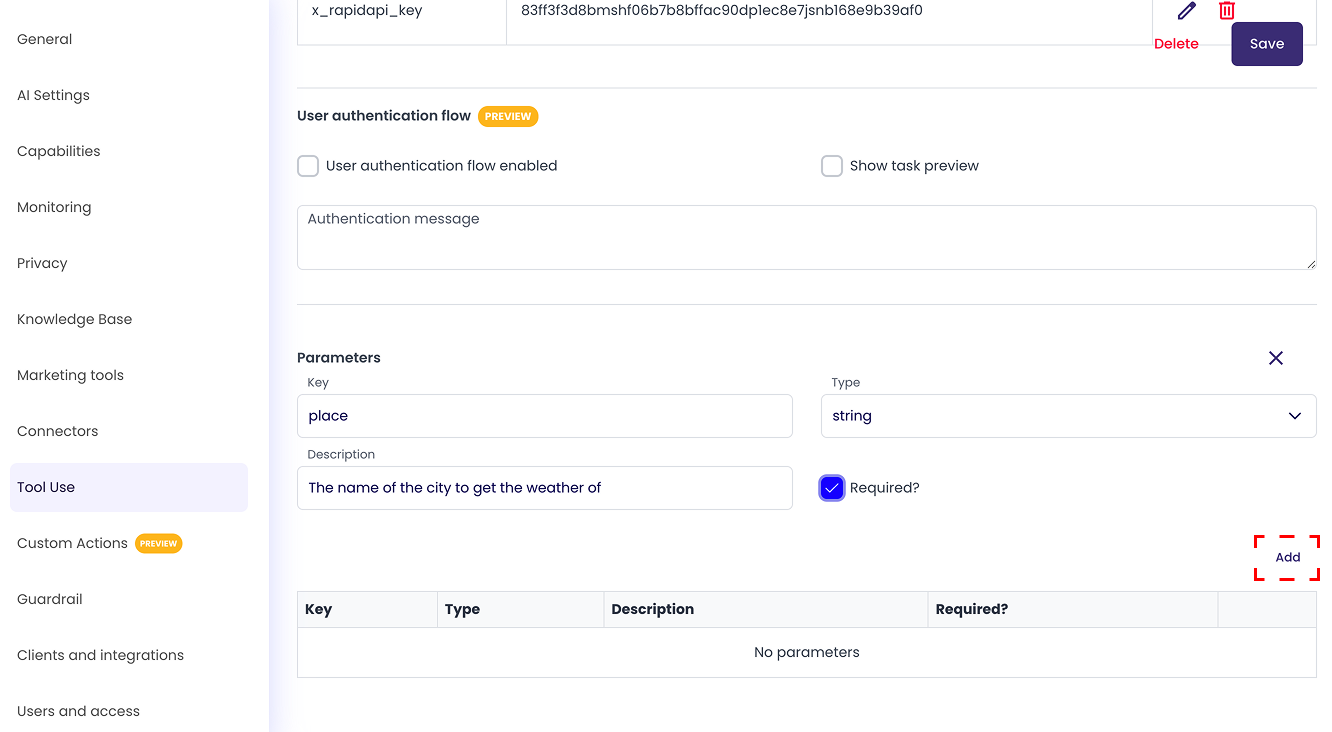
In the parameters section we can configure the parameters to send with the API request, with each parameter being a key - value pair of information.
The key value must be formatted in "snake_case" (only lowercase letters and underscores).
The description value will tell the Agent how to generate the actual value of the parameter, a meaningful description will help the Agent understand how to generate the value better.
The type option field represents the type of value that will be generated, it can be string, number, boolean, array or object.
The required field tells the Agent if the parameter is required or optional in order to call the API.
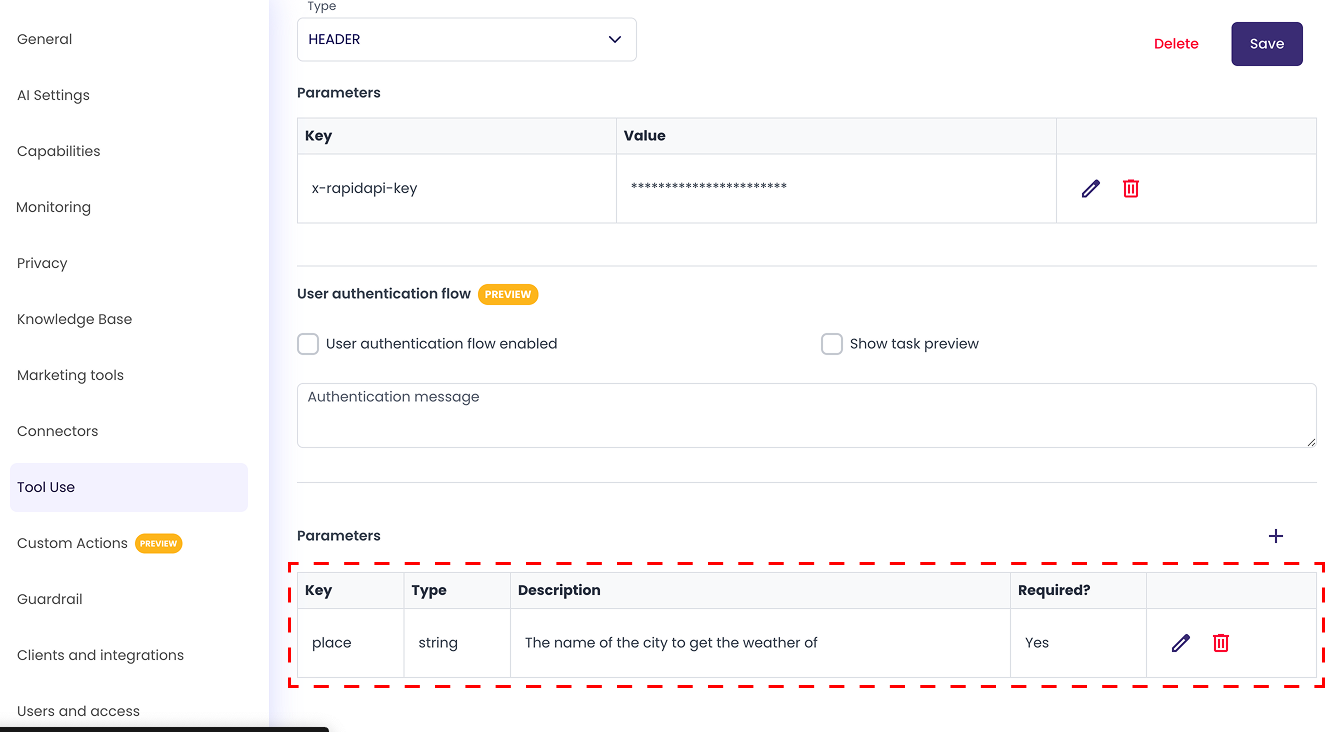
When your parameter configuration is done, press the 'Add' button in the bottom right corner to add the parameter.
After that you will see the parameter you just created in the parameters list, where you can choose to edit or delete it if needed.